Timetics AI offers flexible booking options to match different business requirements.
- One-to-One Personal Booking for personal meetings or consultations.
- Service-Based Booking for predefined services with scheduled availability
This section provides step-by-step instructions on creating a One-to-One Personal Booking in Timetics AI.
Watch the full video to learn how to manage a one-to-one booking.
One-to-One Personal Booking
To create a booking,
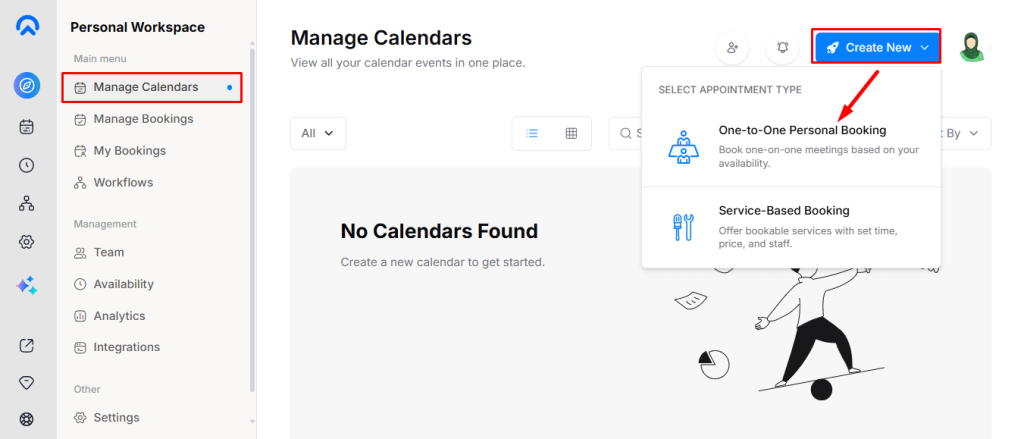
- First, log in to your Timetics AI dashboard. After logging in, navigate to “Manage Calendars” and click the “Create New” button.
- A dropdown menu will appear showing two booking options. Select One-to-One Personal Booking to continue.
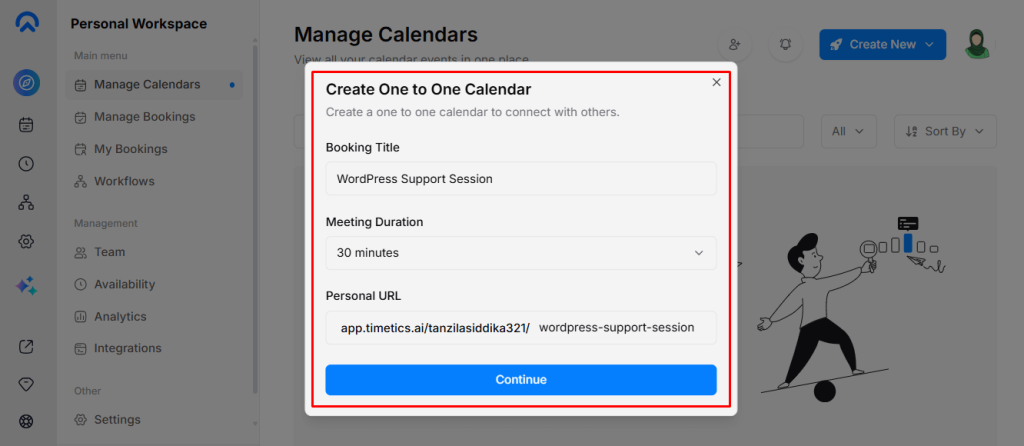
- Once selected, a pop-up will open where you need to enter the Booking Title and set the Meeting Duration. After providing the required information, click the “Continue” button to proceed.
After clicking the Continue button, you will be redirected to the Setup Calendar screen. From here, you can configure all necessary settings for your One-to-One Personal Booking.
Calendar Setup:
In the Calendar Setup section, you can define the basic details of your booking. This includes the Booking Title, Description, Meeting Duration, Personal Booking URL, and Location.
Timetics AI allows you to set your booking as either offline or online.
- For offline bookings, you can choose between “Phone Call” or “In-Person” options. For “In-Person” meetings, select the location and click “Add Branch” to save the address.
- For online bookings, select “Google Meet” as the meeting platform. To enable this option, you must connect your Google account by configuring the Google API from the Settings section.

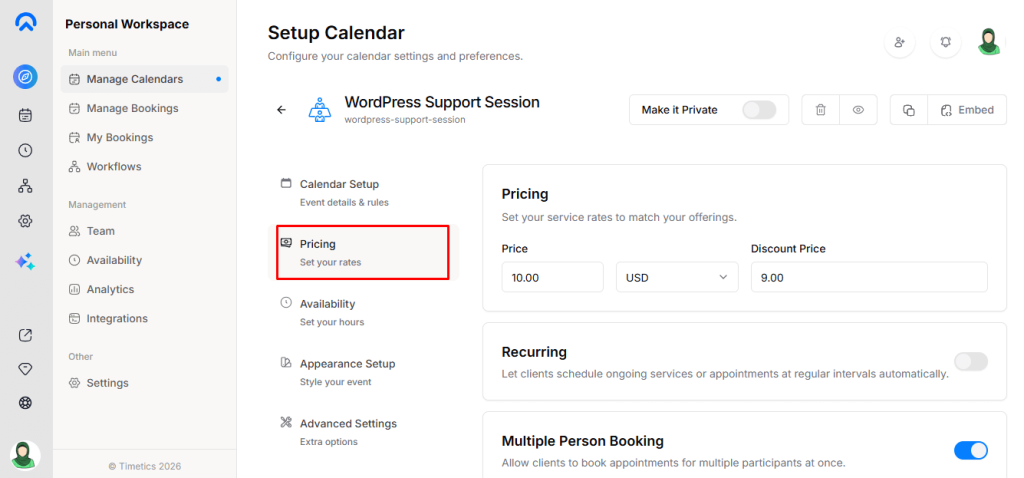
Pricing:
In the Pricing section, you can set your service Rate and currency for paid bookings. You may also add a Discount Price if you want to offer reduced or promotional rates.
You can enable Recurring Bookings, allow Multiple Participants, or permit Guest Bookings. Timetics AI also lets you accept Deposit Payments, apply Coupons, and manage Refund Settings separately based on your service policy.
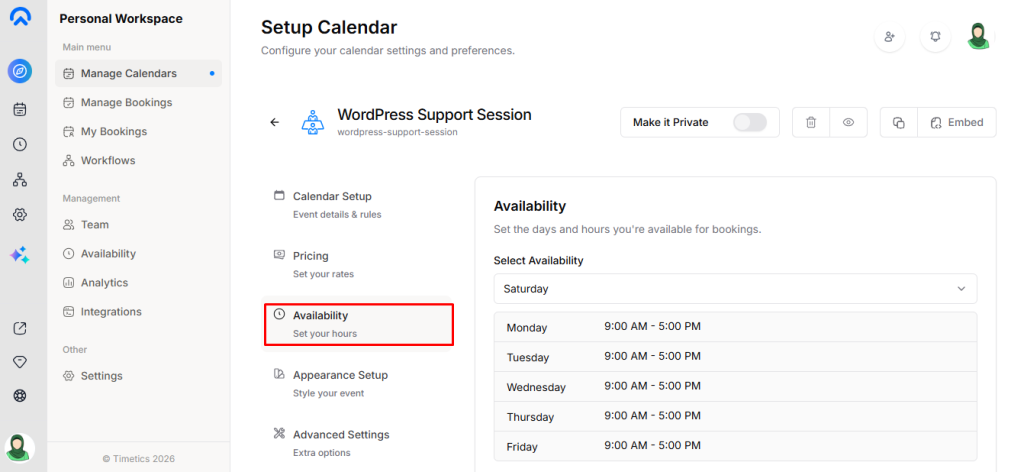
Availability:
In the Availability section, you can define the days and hours when you are available to accept bookings.
You may adjust your Timezone, edit Availability, and add Buffer Time before or after appointments to avoid back-to-back meetings. This section also allows you to limit the number of bookings per Day, Week, or Year, and control how far in advance users can schedule appointments.
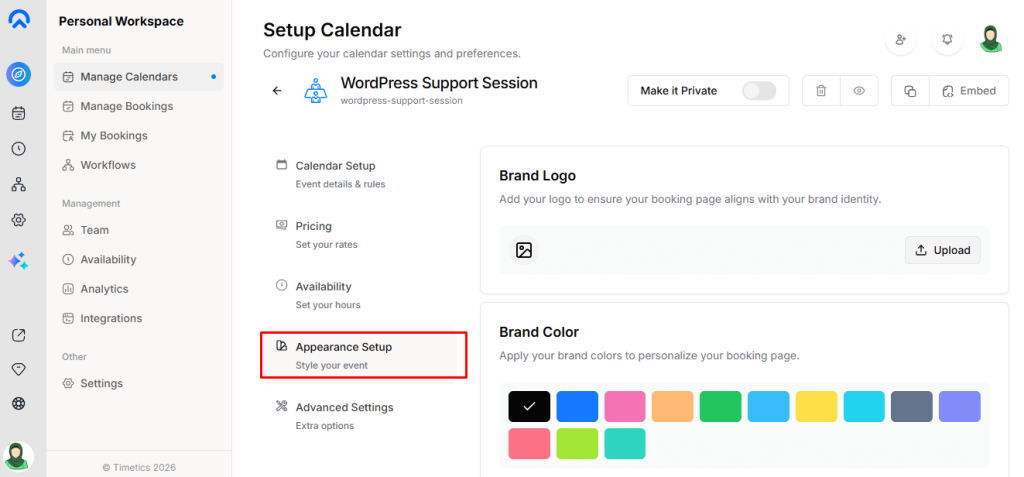
Appearance Setup:
In the Appearance Setup section, you can customize the visual style of your booking page. You can upload your Brand Logo, apply Brand Colors, and choose the preferred Booking Layout, such as Month, Week, or Day view.
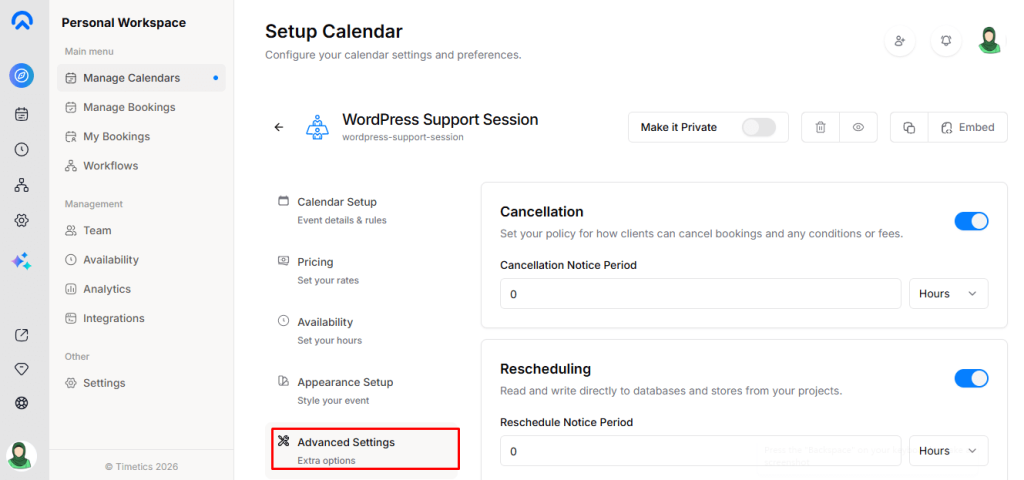
Advanced Settings:
In the Advanced Settings section, you can manage additional booking controls and preferences. You can set Cancellation and Rescheduling Rules, customize Booking Questions for invitees, and enable Calendar Conflict Checks to prevent double bookings.
At the top of the Calendar Setup, you can manage Booking Status, make it Private, Delete, Preview, Duplicate, or Embed it, quickly controlling visibility without altering core settings.
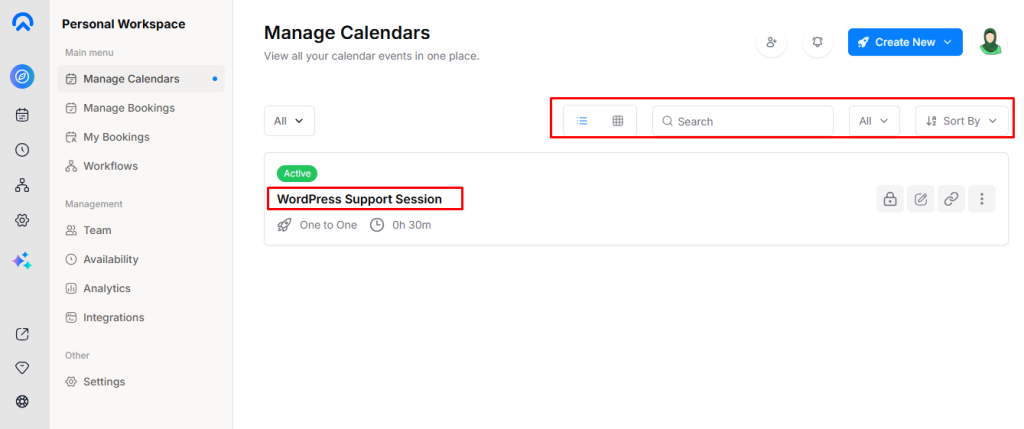
After all settings, go to the Manage Calendars menu, and you can view all bookings. You can filter by Private or Public, switch between Grid or List View, search bookings, sort Ascending or Descending, and filter by One-to-One booking or Service-Based booking.
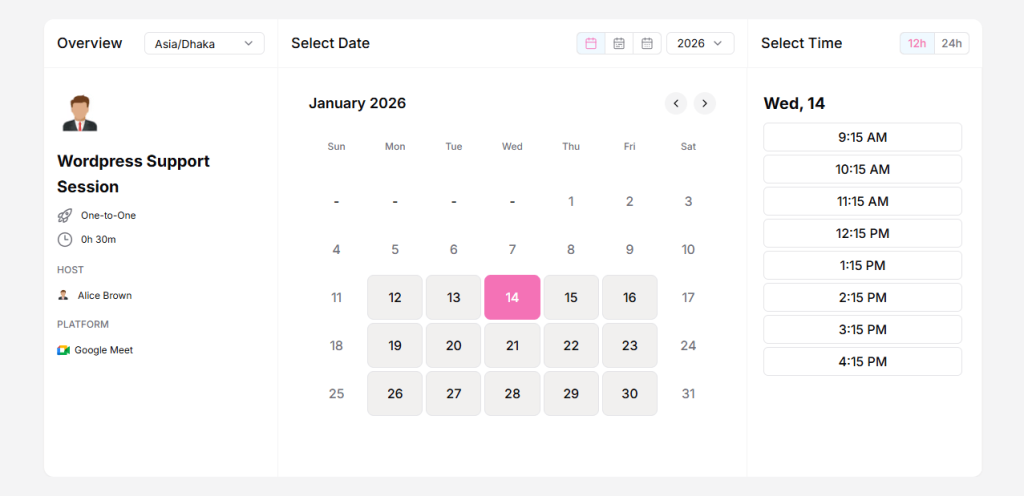
Front-End One-to-One Personal Booking View