Timetics AI helps you manage one-to-one meetings and service-based bookings with ease. Follow the steps below to get started quickly.
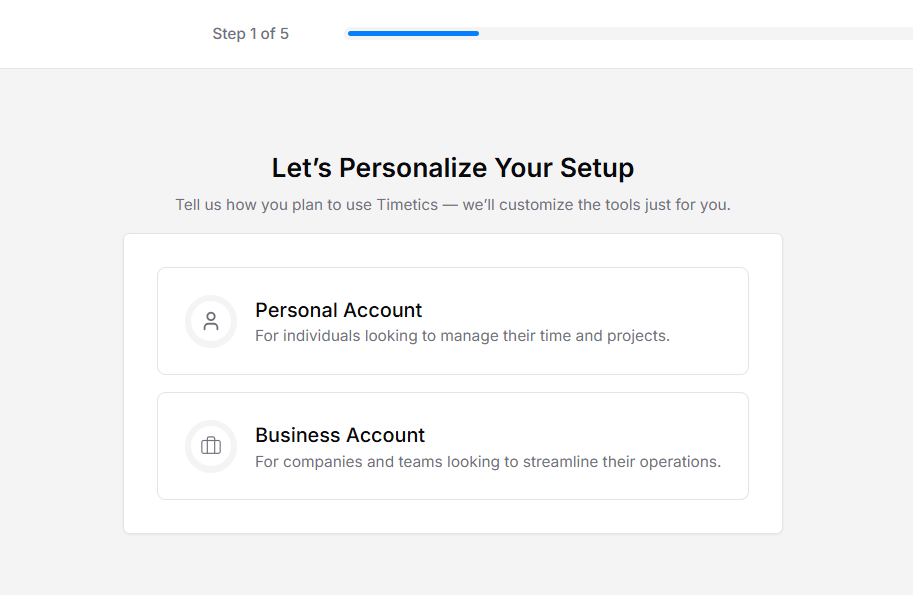
Step 1: Choose Your Account Type
When you log in for the first time, select how you want to use Timetics.
- Personal Account – For managing personal meetings or individual services
- Business Account – For client work, paid services, or team management
Select the option that fits your needs and continue.
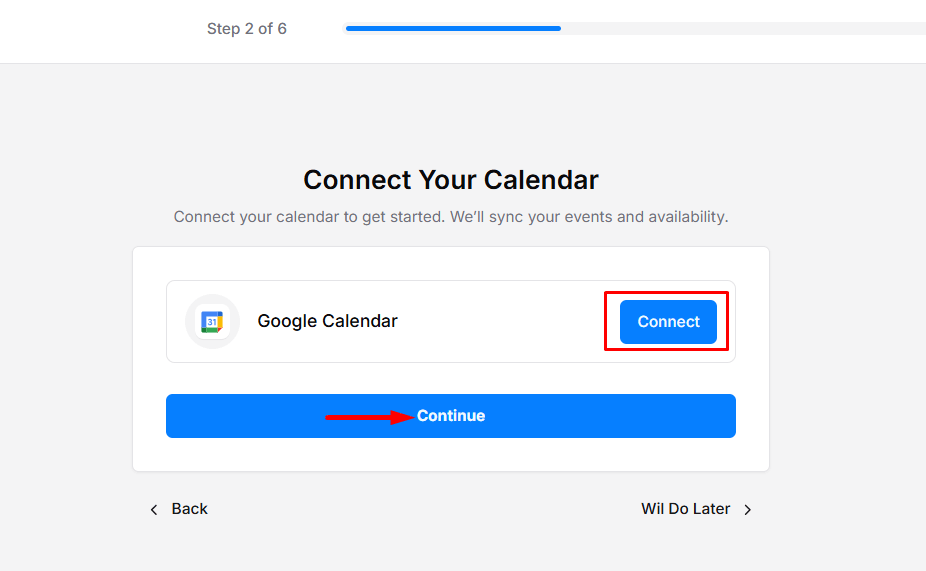
Step 2: Connect Your Calendar
Connect your calendar to sync availability and avoid conflicts.
How to connect Google Calendar
- Click Connect next to Google Calendar
- Sign in and allow access
- Click Continue
This helps to prevent double bookings, Auto-sync meetings, and keep your schedule updated in real time.
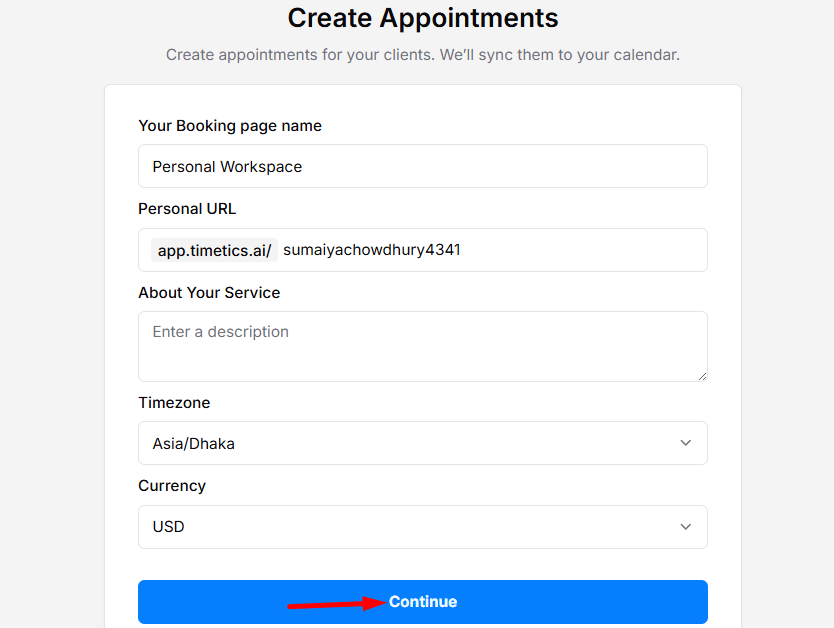
Step 3: Create Your Booking Page
To set up your public booking page, fill in Booking Page Name, Service Description, Timezone, and Currency. Click Continue to proceed.
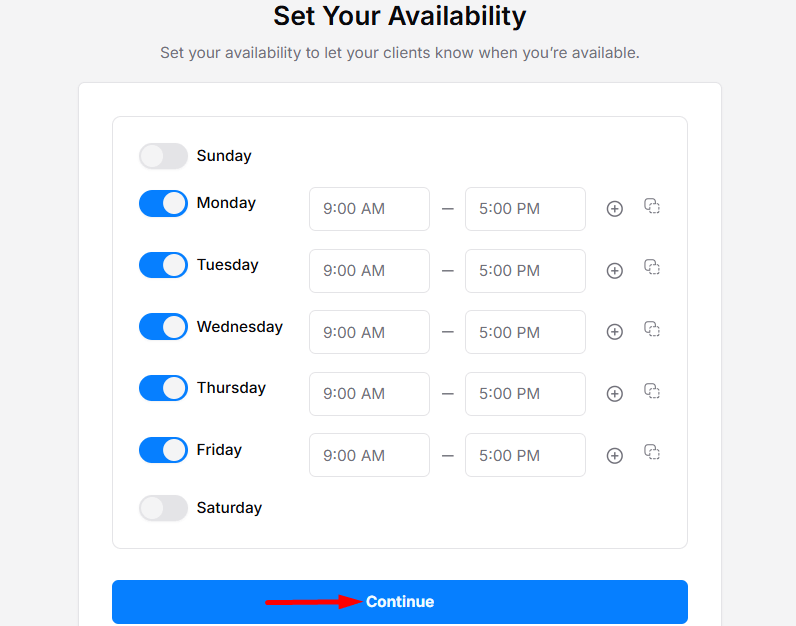
Step 4: Set Your Availability
Define when people can book you.
You can: Turn days on or off, Set working hours per day, Add multiple time slots, and Copy time slots to other days. Click Continue when finished.
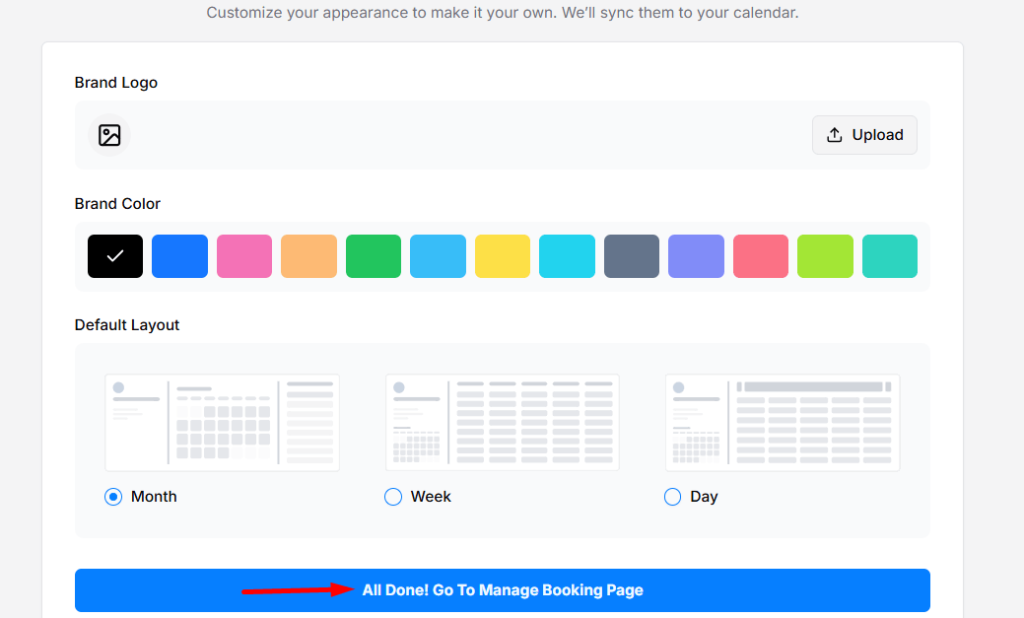
Step 5: Customize Appearance
Match your booking page with your brand.
Options include:
Uploading a logo
- Choosing a brand color
- Selecting a calendar layout (Month / Week / Day)
Click All Done! Go To the Manage Booking Page.
🎉 Your booking page is live.
Share your link, accept bookings, and manage everything from your Timetics dashboard.