Step-by-Step Instructions
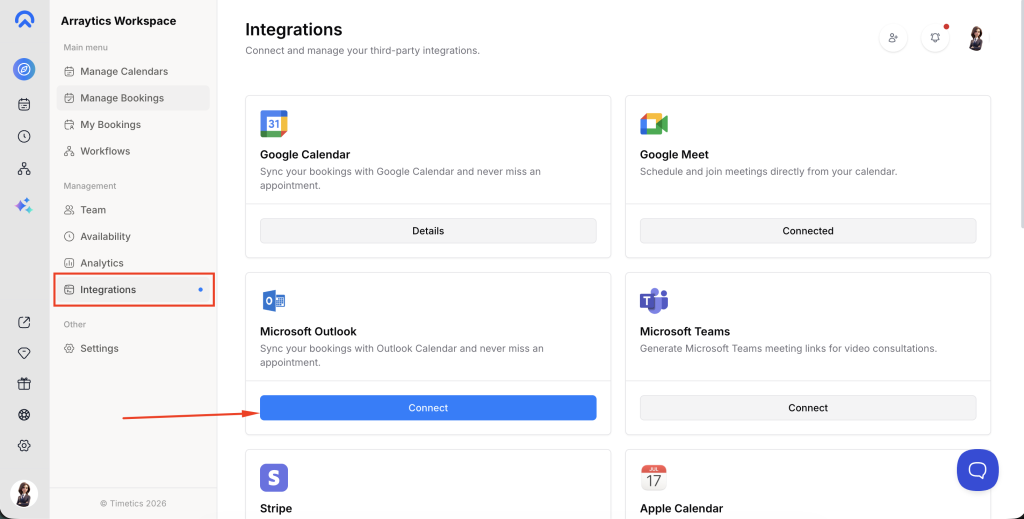
Step 1: Access Integrations
Navigate to Dashboard → Integrations section.
Step 2: Initiate Connection
Find the Microsoft Outlook option and select “Connect” beneath it.
Step 3: Microsoft Authentication
Choose your account if it is already present in Microsoft authentication.
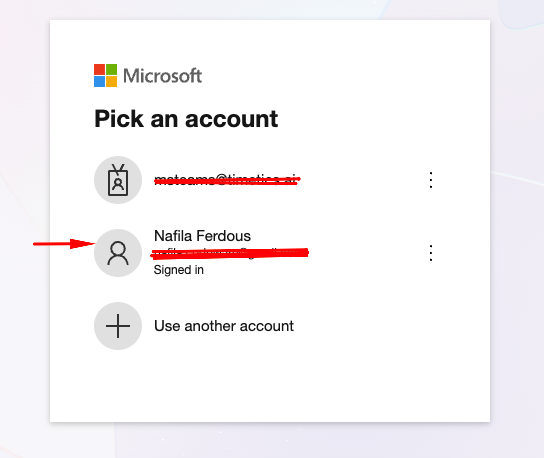
Or create a new one

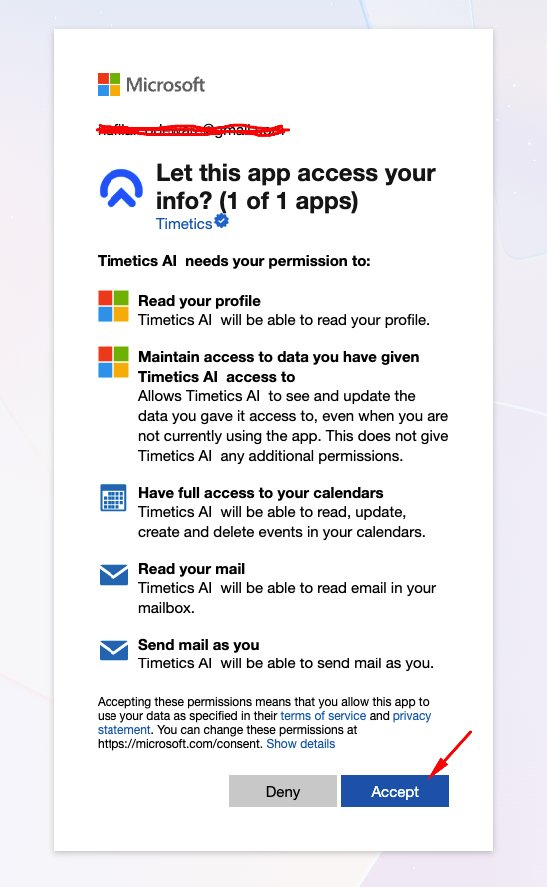
Sign in with your Microsoft account and allow the required permissions (calendar read/write, online meetings, mail, and offline access) so Timetics AI can manage your calendar on your behalf.
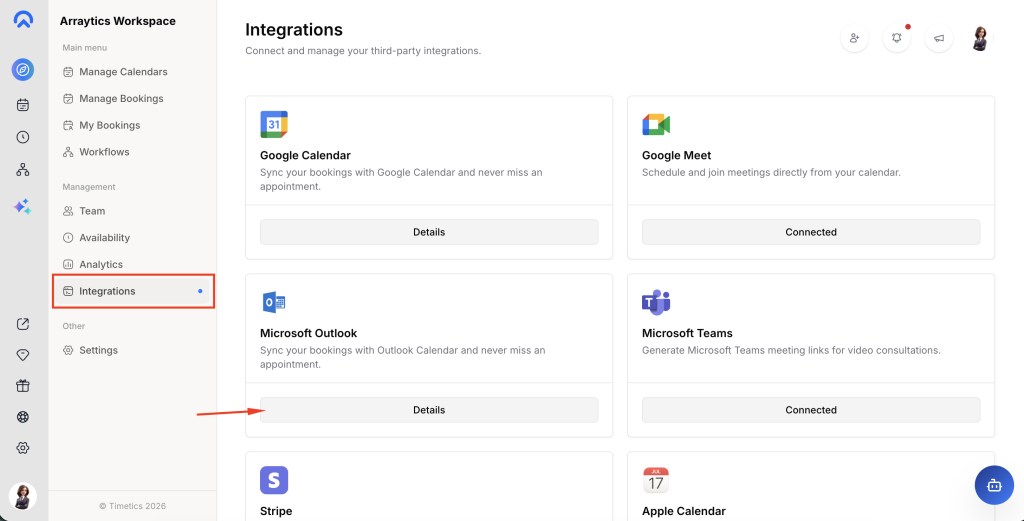
Step 4: Verify Connection
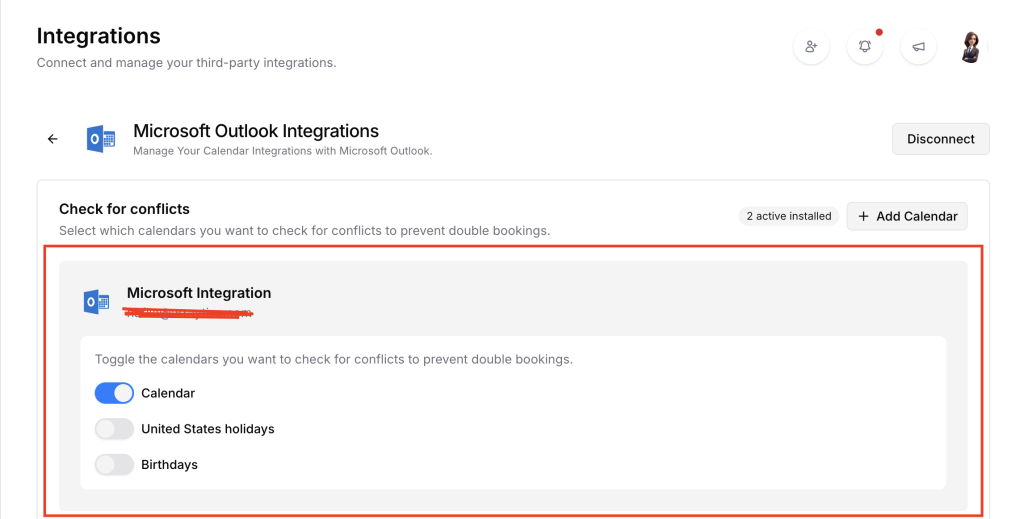
After authorization completes, select “Details” to confirm the calendar is properly connected. You will see your connected email address along with a list of your Outlook calendars and a badge showing how many are active.
Step 5: Manage Calendars
Inside the Details view, toggle individual calendars on or off to control which ones are checked for conflicts when bookings are made.
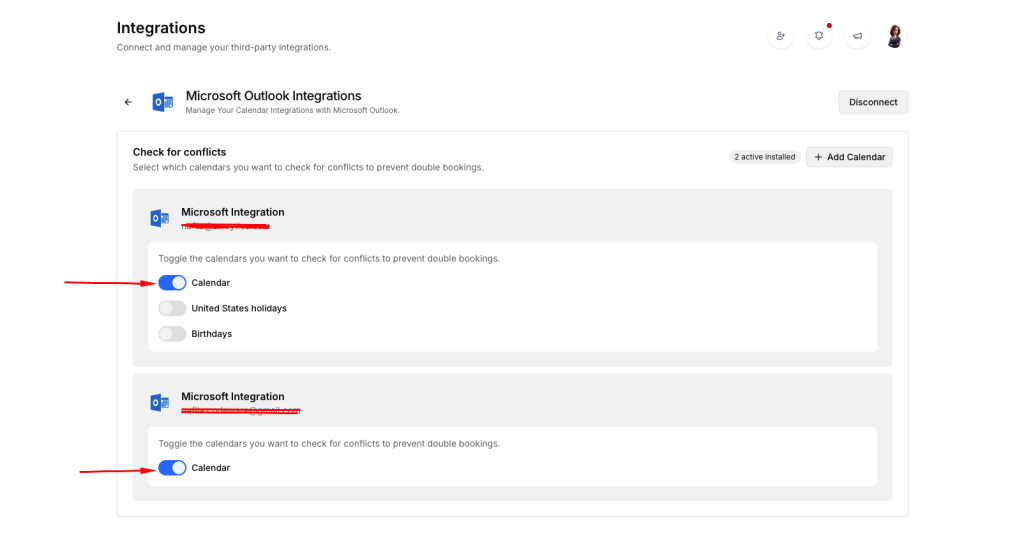
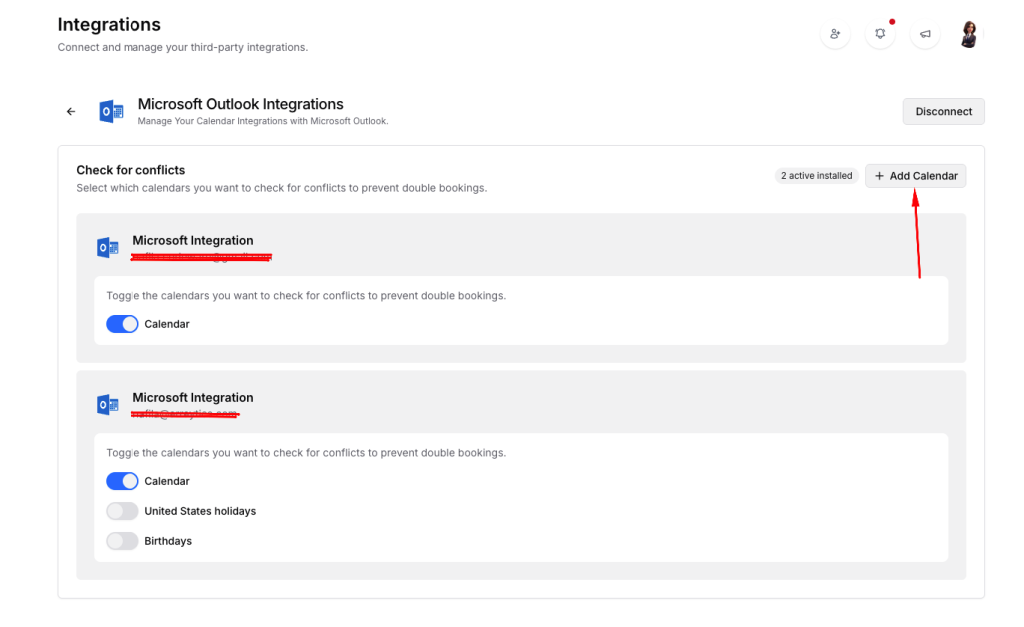
Step 6: Optional – Multiple Calendars
The system supports connecting multiple Microsoft Outlook accounts. Click “Add Calendar” inside the Details view to link an additional Outlook account.
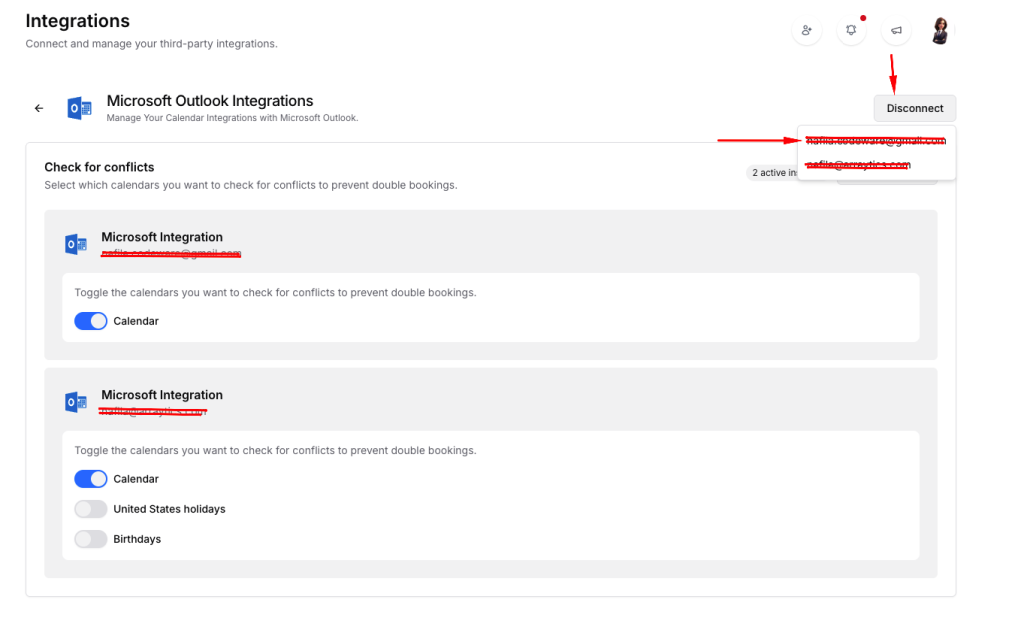
Step 7: Disconnect (Optional)
To remove an account, open the disconnect dropdown in the Details view, select the email address you want to remove, and confirm.
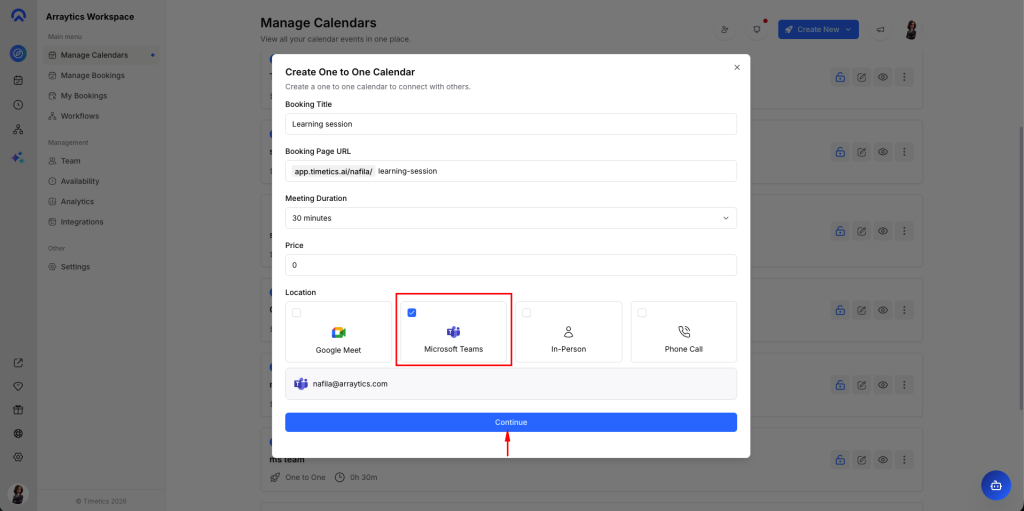
Step 7: Set Calendar Location
Navigate to Manage Calendars menu, click on Create New button on top header. From dropdown select calendar type One-toOne Personal Booking.
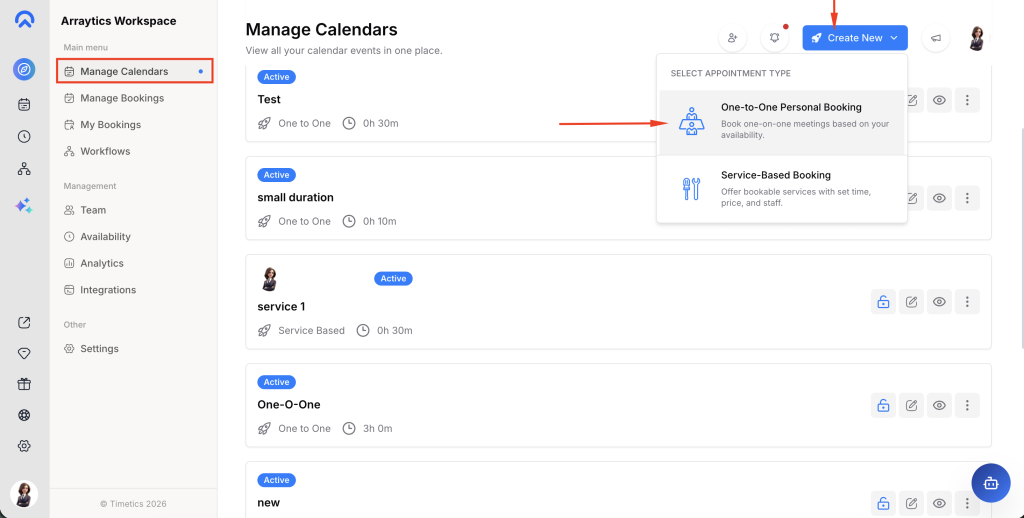
Select Microsoft Teams from location and click on the Continue button
Key Functionality
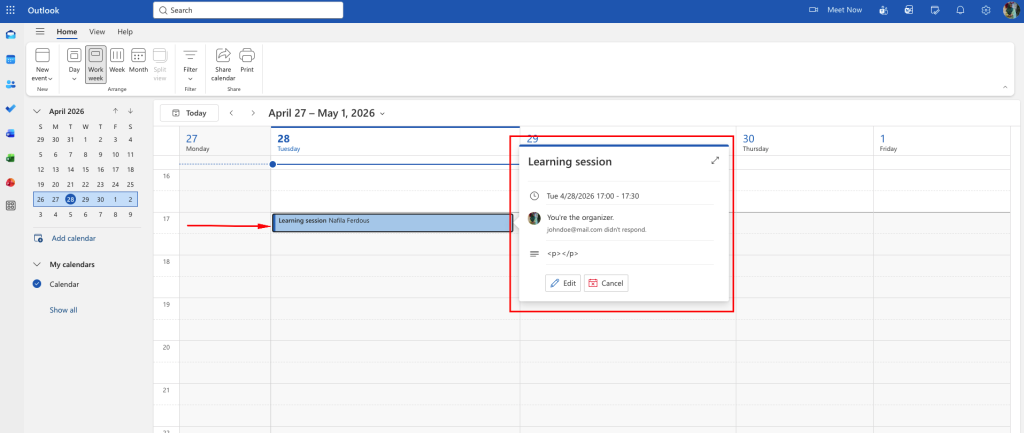
Once integrated, any booking or appointment created in Timetics AI will automatically sync to your Microsoft Outlook calendar. Existing Outlook events are also imported so Timetics AI can prevent double-bookings against your real availability. This creates seamless two-way visibility between both platforms, eliminating manual calendar updates.
Prerequisites
- Active Timetics AI account
- Microsoft account credentials (personal, work, or school)
- Permission to authorize third-party calendar access
Notes
The integration takes effect instantly upon successful authorization. Users can verify connection status, manage which calendars participate in conflict checking, and add or remove accounts at any time through the Details view.