Overview
This documentation guides users through integrating Zoom with Timetics.ai to automatically generate meeting links when bookings are confirmed. The integration uses OAuth 2.0 for secure authorization.
Adding the App
Prerequisites
Before connecting, ensure you have:
– An active Timetics.ai account (Free or Paid)
– A Zoom account (Free or Paid)
– Admin access to your Timetics account
How to Connect Zoom (Simple 3 Steps)
Step 1: Open Zoom Integration Settings
1. Log into your **Timetics Dashboard**
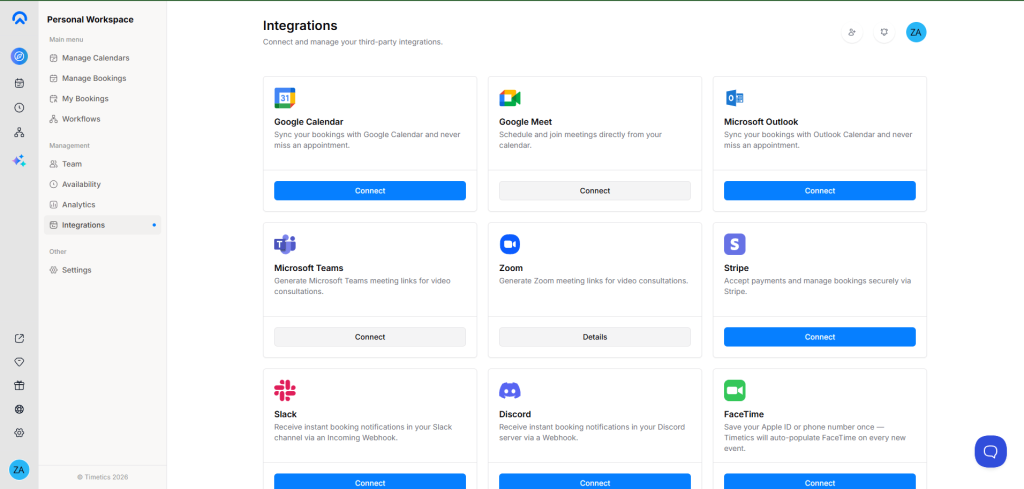
2. Go to **Workspace** → **Settings** → **Integrations** → **Zoom**
3. Click the **”Connect Zoom”** button
Step 2: Authorize Timetics on Zoom
1. You’ll be redirected to Zoom’s authorization page
2. Review the permissions requested:
– Create meetings for you
– View meeting details
– Verify your account
3. Click **”Allow”** to grant permission
Step 3: Confirm Connection
1. You’ll be redirected back to Timetics
2. You should see a **”Successfully Connected”** message
3. Your Zoom account is now linked
✅ **That’s it!** Your integration is now active.
All future bookings will automatically generate Zoom meetings.
Troubleshooting Connection Issues
Problem: Authorization Page Doesn’t Open
**Solution:**
– Make sure you’re logged into your Zoom account in the same browser
– Clear browser cookies for zoom.us
– Try using an incognito/private window
– Try a different browser (Chrome, Firefox, Safari, Edge)
Problem: “Authorization Failed” Error
**Solution:**
– Go back and try again
– Ensure you’re logged into the Zoom account you want to use
– Check that your Zoom account is in good standing
– Contact Zoom support if your account is restricted
Problem: “Invalid Redirect URL” Error
**Solution:**
– This is a backend configuration issue
– Contact Timetics support at [[email protected]](mailto:[email protected])
– Include: “Zoom integration showing redirect URL error”
Problem: Connection Says “Pending” or “In Progress”
**Solution:**
– Wait 30 seconds and refresh the page
– Check your Timetics inbox for any authorization notifications
– Try clicking “Connect” again
– Contact support if the issue persists
Problem: Zoom Account Not Recognized
**Solution:**
– Log out from Zoom completely (zoom.us)
– Log back into the correct Zoom account
– Return to Timetics and try connecting again
– Ensure you’re using the Zoom account with the email you want meetings created from
Problem: Zoom Meetings Not Creating After Connection
**Solution:**
– Verify the integration shows “Connected” (green status)
– Test by creating a new booking
– Check if confirmation email includes Zoom link
– Try disconnecting and reconnecting
– Contact support if issue continues
Still Need Help?
Before contacting support, verify:
– ✓ You’re using the correct Zoom account
– ✓ Your Zoom account is active (not expired or restricted)
– ✓ You clicked “Allow” on the Zoom authorization page
– ✓ You’re using a modern browser
– ✓ Browser cookies are enabled
Usage
### Prerequisites
To use Zoom meetings with your bookings:
– ✓ Zoom integration is connected (shows “Connected” status)
– ✓ Your Zoom account is active
– ✓ You have at least one meeting type configured in Timetics
– ✓ Guest email is captured during booking
How It Works
Automatic Meeting Generation
Once connected, here’s what happens automatically:
1. **Guest Books a Meeting**
– Guest visits your Timetics booking page
– Guest selects an available time slot
– Guest enters their email and confirms booking
2. **Timetics Creates Zoom Meeting**
– Your Zoom API creates a unique meeting
– Meeting link and ID are generated
– Information is stored securely in Timetics
3. **Confirmation Sent**
– Guest receives email with Zoom meeting link
– You (host) receive booking notification with link
– Both can join at the scheduled time
4. **Meeting Happens**
– Both parties join via the Zoom link
– Recording, chat, etc. work normally
– Meeting ends at scheduled time
5. **After the Meeting**
– If booking is cancelled → Meeting is cancelled
– If booking remains → Link stays valid on Zoom
– Recordings are saved to your Zoom account
Use Cases
One-to-One Consultations
– Consultants, coaches, therapists booking 1-on-1 sessions
– Each client gets a unique Zoom link
– Automatic reminders include the link
Internal Meetings
– Team meetings scheduled in Timetics
– All attendees automatically get Zoom link
– Seamless meeting experience
What Data Is Accessed
When you connect, Timetics accesses:
– ✓ Your Zoom account identity (to confirm it’s you)
When meetings are created:
– ✓ Ability to create meetings on your account
– ✓ Meeting link and ID (returned after creation)
**What is NOT accessed:**
– ✗ Your password
– ✗ Your contact list
– ✗ Your recordings
– ✗ Your account settings
– ✗ Your personal information
**Where data is stored:**
– Meeting links are encrypted in Timetics database
– Only you and your guests have access
– Not shared with anyone else
Supported Meeting Types
– ✓ One-to-one meetings
– ✓ One-to-many (group) meetings
– ✓ Recurring bookings (each instance gets its own meeting)
– ✓ All Zoom account types (Free, Pro, Business, Enterprise)
Meeting Features
The meetings use your full Zoom account features:
– Screen sharing
– Recording (saved to your Zoom account)
– Chat
– Virtual backgrounds
– Waiting room
– etc.
All Zoom features depend on your subscription level.
Removing the App
How to Disconnect
Option 1: From Timetics (Quick)
1. Go to **Settings** → **Integrations** → **Zoom**
2. Click **”Disconnect”** button
3. Confirm when prompted
4. ✓ Disconnected immediately
#### Option 2: From Zoom Account (Full Revocation)
1. Log into [zoom.us](https://zoom.us)
2. Go to **My Apps** (top navigation)
3. Find **Timetics.ai** in the list
4. Click **”Remove”**
5. ✓ Access fully revoked
What Happens When You Disconnect
Immediately:
– Timetics **cannot create new meetings**
– Your access token is **permanently deleted**
– The connection is **removed** from Timetics
To Your Existing Bookings:
– ✓ Old booking links **still work**
– ✓ Guests can still join previous meetings
– ✓ Booking records remain in Timetics
To New Bookings:
– ✗ **No Zoom links** will be generated
– You’ll need to manually create Zoom meetings or reconnect
To Your Zoom Account:
– Your Zoom account is **unaffected**
– All your meetings and recordings remain in Zoom
Data Removal
When you disconnect:
**Timetics Deletes:**
– ✓ Your access token
– ✓ Authorization status
**Timetics Keeps** (for your records):
– Your booking history
– Old meeting links (you can delete manually if needed)
How to Reconnect
To use Zoom again:
1. Go to **Settings** → **Integrations** → **Zoom**
2. Click **”Connect Zoom”** button
3. Follow the authorization steps again
4. ✓ You’re reconnected and can create meetings again
You can reconnect to the same or a different Zoom account.
FAQ
**Q: Do I need to create a Zoom app to use this?**
A: No! Timetics provides the app. You just click “Connect” and authorize.
**Q: What if I don’t have a Zoom account?**
A: Create one at [zoom.us](https://zoom.us) first (free or paid), then connect it to Timetics.
**Q: Can multiple staff members use the same Zoom account?**
A: Yes. Once connected at the account level, all staff can create meetings from that Zoom account.
**Q: Can I switch Zoom accounts?**
A: Yes. Disconnect the current account, then connect a different one.
**Q: What if my Zoom subscription expires?**
A: New meetings can’t be created. Reconnect once your subscription is renewed.
**Q: Are my meeting recordings automatically saved to Timetics?**
A: No. Recordings go to your Zoom account only. You access them through Zoom.
**Q: What if a booking is cancelled?**
A: The Zoom meeting is automatically cancelled too.
**Q: Can guests join without a Zoom account?**
A: Yes. Zoom links work for anyone – they don’t need to create an account.