Timetics.Ai events allow you to design, arrange, and manage your online and offline events from a single, unified dashboard!
Here in this article, we will learn how you can create an event on Timetics.Ai.
Let´s get an overview of the ´Events´ editor–
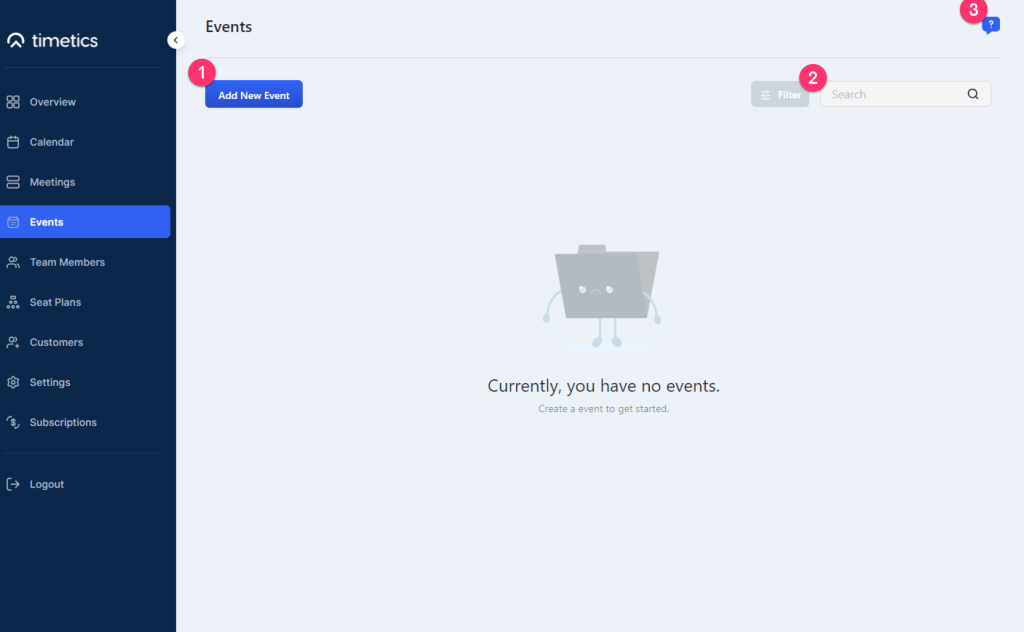
1️⃣ Allows you to add new events.
2️⃣ Search your desired event by typing their names.
3️⃣ Access the Timetics.Ai Help Desk & Support.
How to Create & Update an Event-
To create an event, follow the steps below-
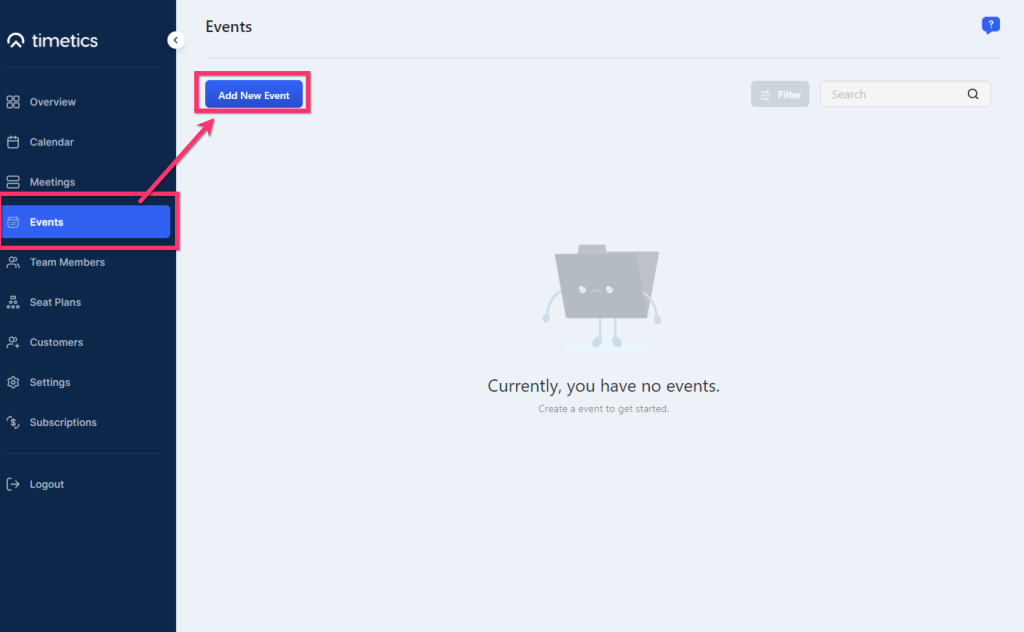
1️⃣ Go to Events.
2️⃣ Click on ´+ Add New Event´
A new form will appear. Now, fill in all the required information, and click on ´Create Events´.
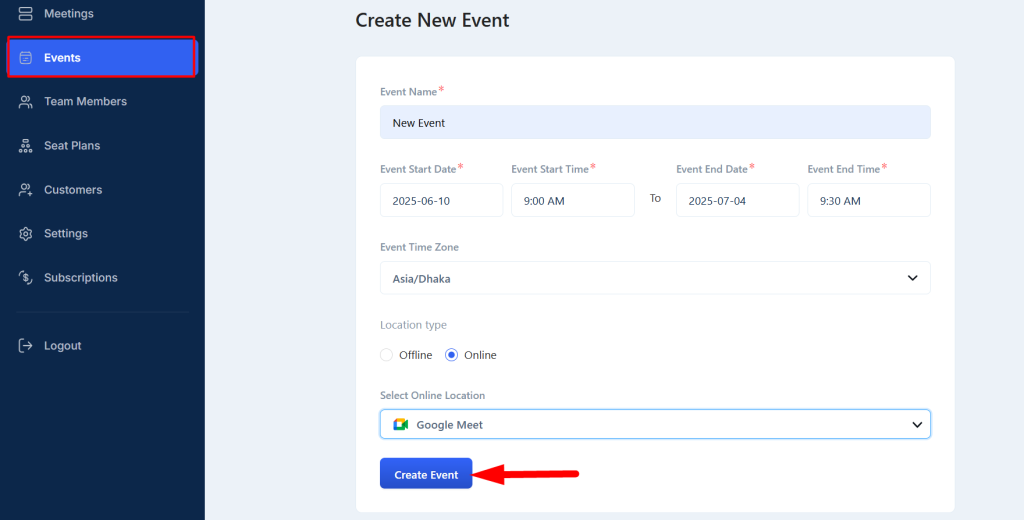
Here´s a breakdown of the required fields you should fill to create the event—
1️⃣ Event´s Name- Add the name of your event.
2️⃣ Event Start Date & Time- Set the date and time from when the event will start. It takes the current date as default. So, make sure you are adding the date carefully!
3️⃣ Event End Date & Time- Set the date and time exactly when the event will end.
4️⃣ Event time zone: Choose your preferred time zone or set the time zone where the event will held.
5️⃣ Location type: Select whether it is an offline or virtual event.
6️⃣ Venue Location: Add the location of the venue if it´s an offline event.
Now Select ´Create event´ to move forward to the next step.
Here you´ll get five different fields to change (arranged on the left sidebar).
Basic Info
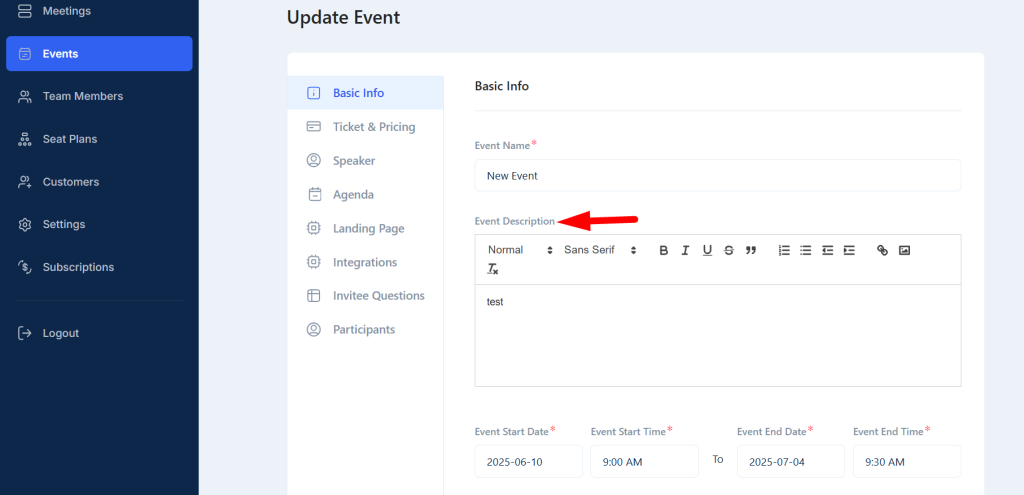
From the Basic Info page, you can add an Event description and change the basic fields. 🔽
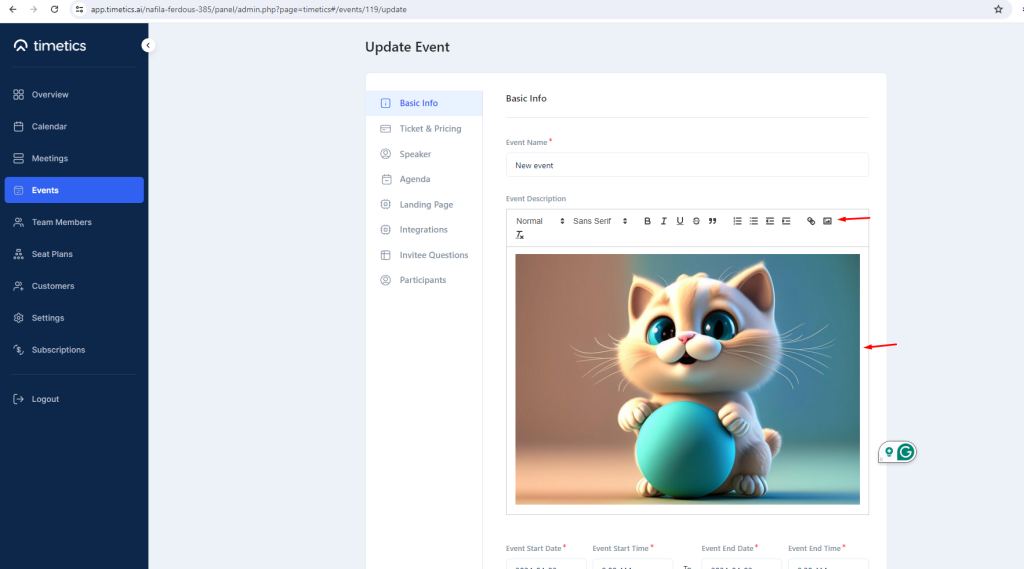
Here, you can also add banners and other images for the event as well-
Tickets & Pricing
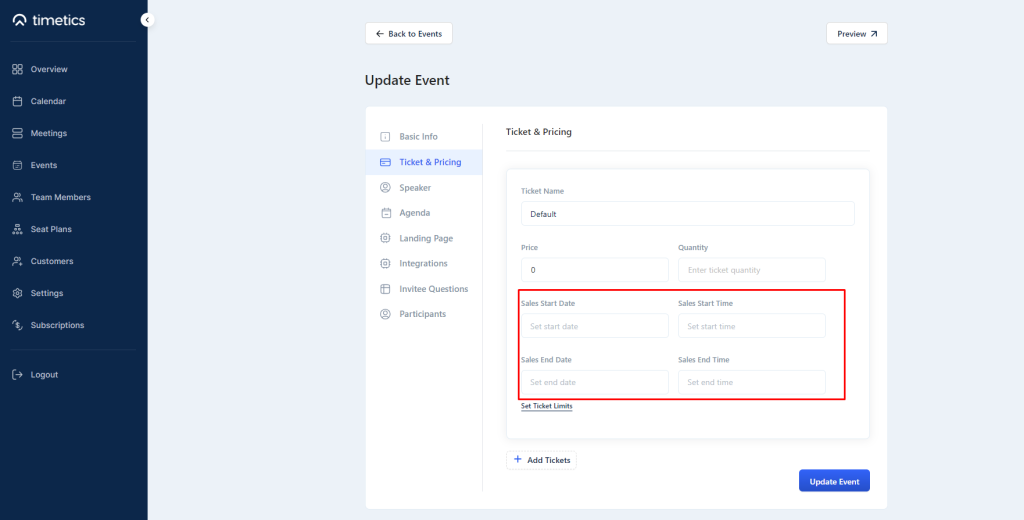
Add multiple tickets, add ticket names, and each of those types of ticket´s price & quantity. Add the dates and times when you are starting to sell the tickets, and add limits for how many tickets one should take for maximum and minimum.
You can set multiple start and end time for specific ticket tiers-
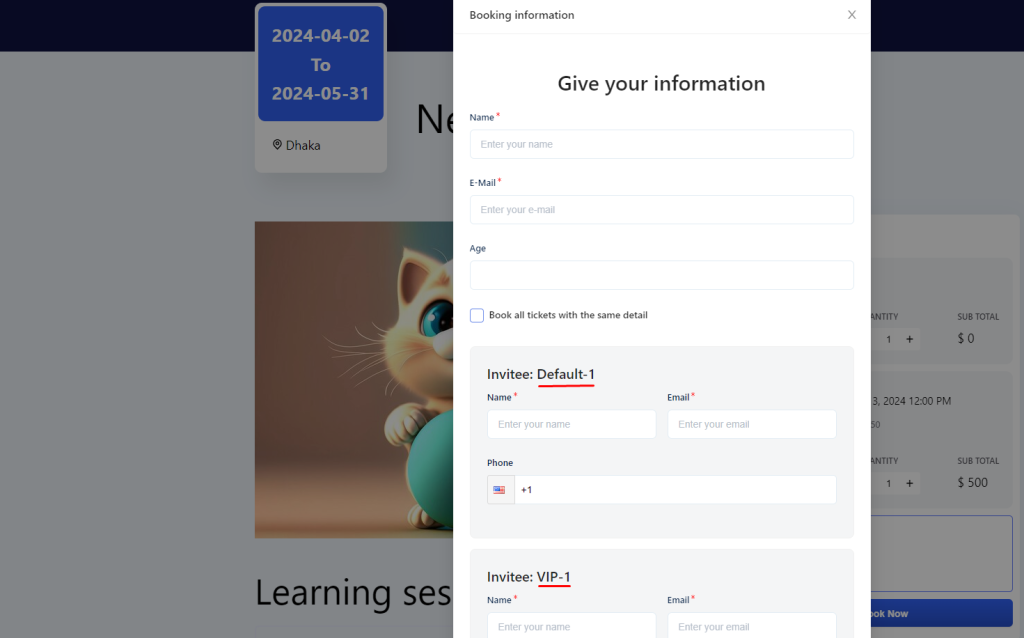
On event booking form, you can discharge attendees confusion by showcasing the ticket type on the form-
Speaker
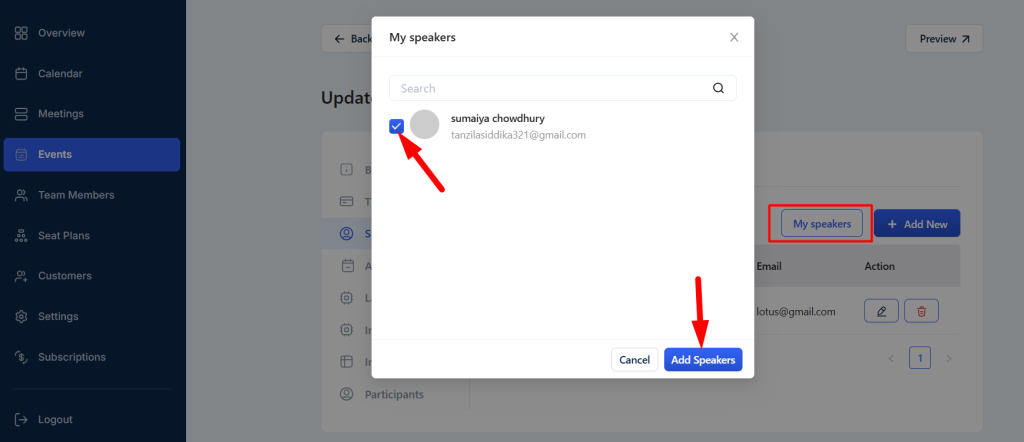
Add a new speaker or assign an already existing person as a speaker for the event. 🔽
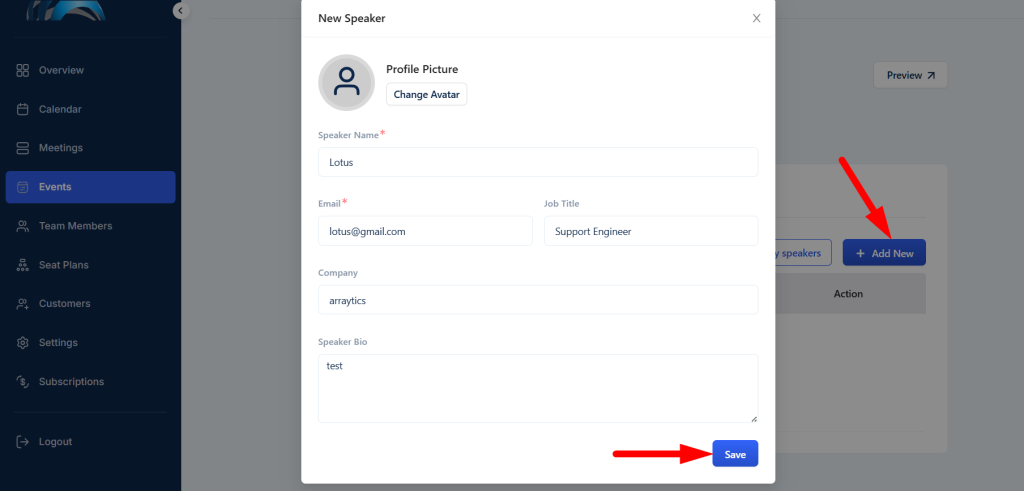
You can add speaker details, bio, and images as well while adding a new speaker.
Agenda
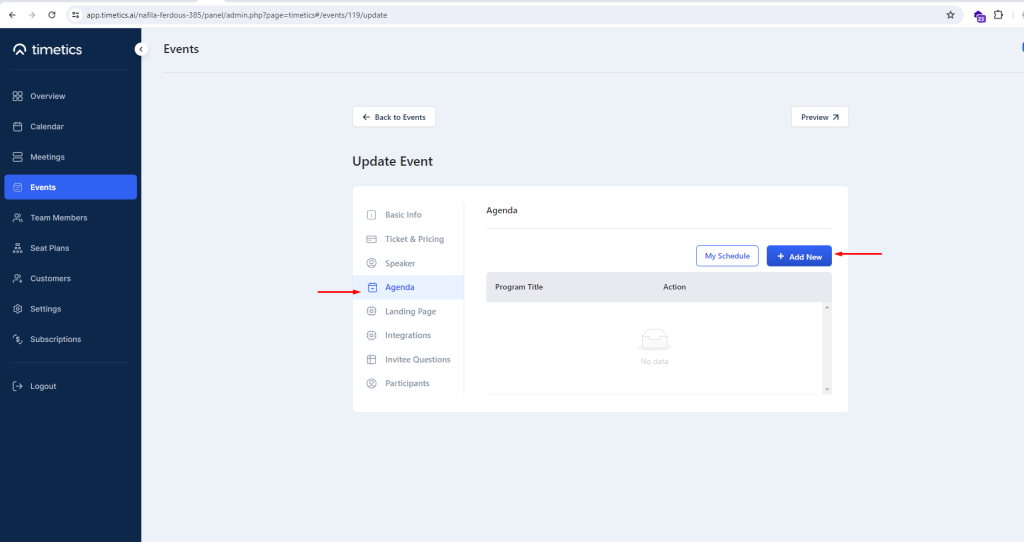
🔽 Share event session details for the audience by creating different sessions and agenda.
for this, simply Go to Agenda, and select ´+Add New´-
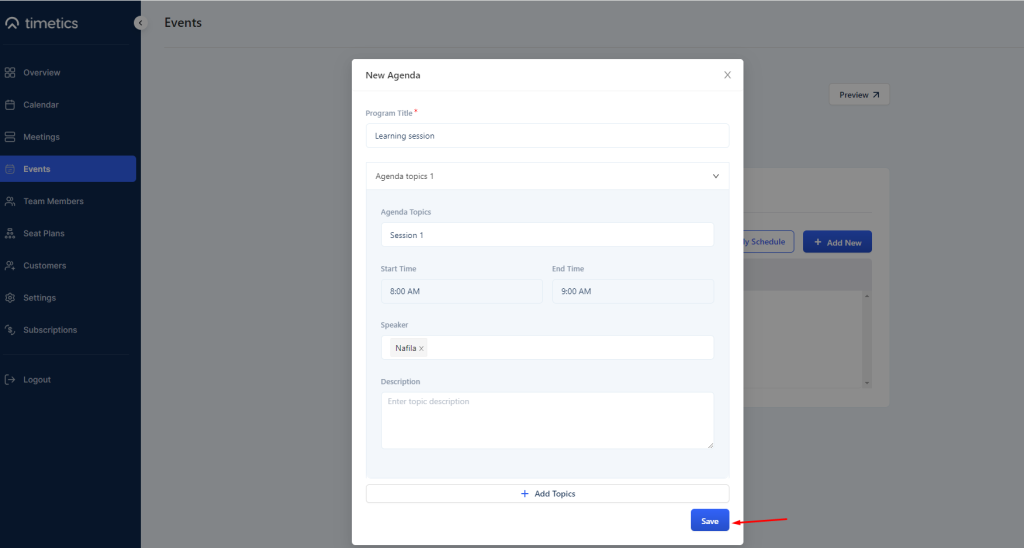
Now fille out the form by adding the required information into it and select ´Save´-
Here, you can see the agenda for a particular event session is successfully created.
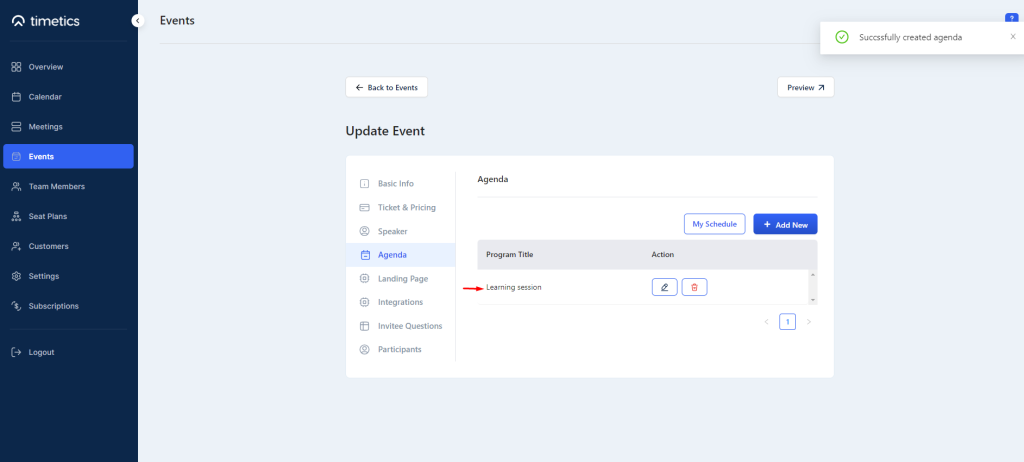
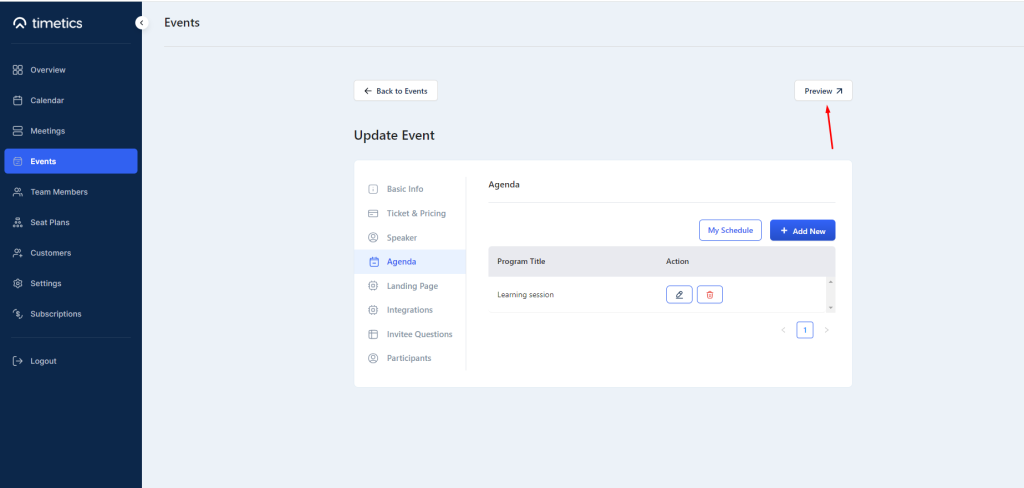
You can also Click on preview button to check the outlook of your agenda and edit to bring any changes-
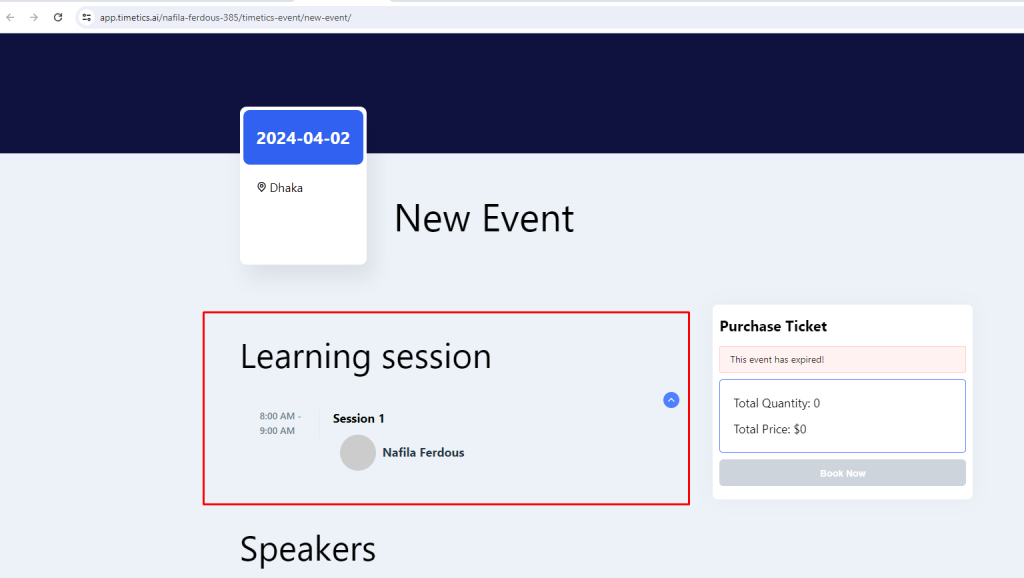
Your event attendees can check out a sessions´ host name, duration time, and read the agenda by clicking on the 🔽 button.
Landing Page
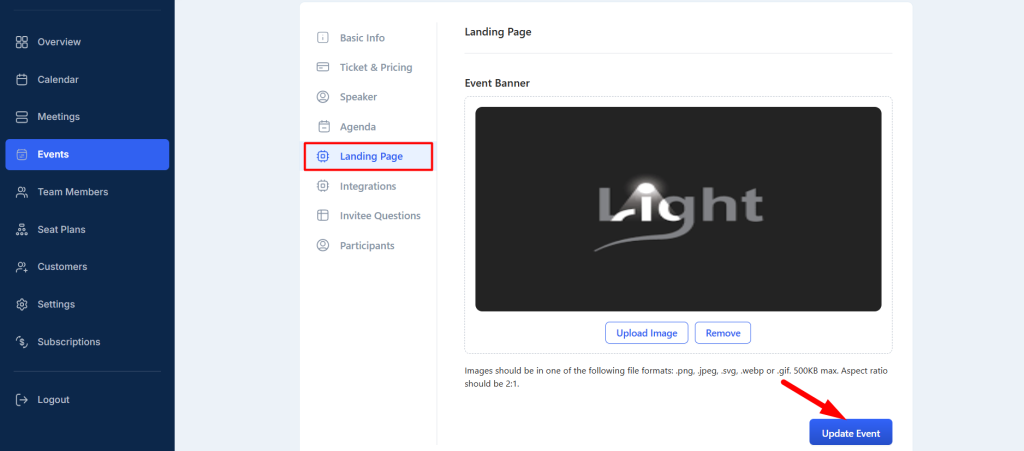
🔽 Add media or virtual elements for the event. Here, you can add your event´s banner as well!
Integrations
Connect Pabbly payment get away for a smoother payment system. You can also automate your event workflows by integrating Zapier with your Timetics account.
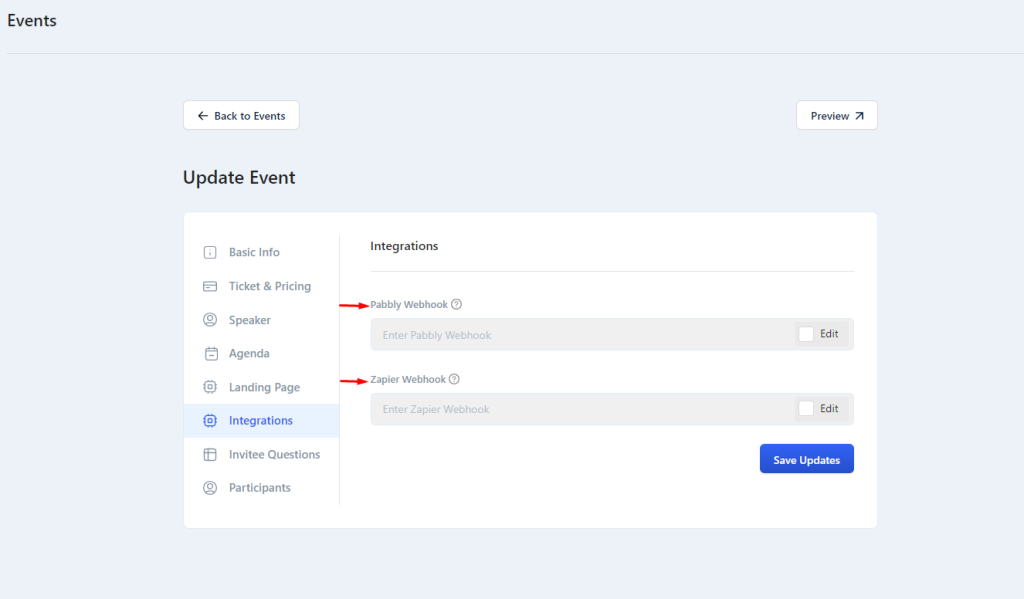
Check out this documentation for a smoother Pabbly and Zapier integration process.
Invitee Questions
You can add what are the questions you need to ask the attendees before the booking confirmation. For example- attendees full name, email address, age, special need, and allergies, etc.
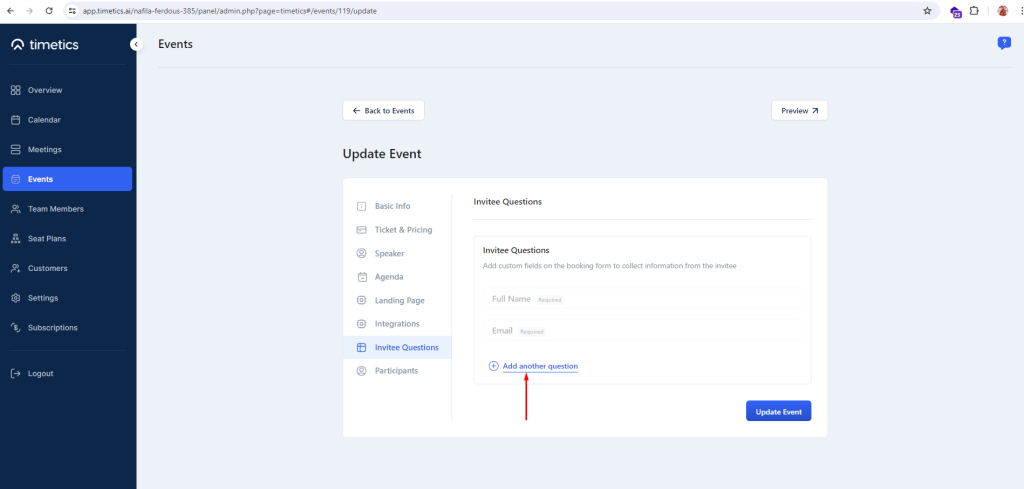
Specify, which question fields are required or not and it will appear in front of your attendees in this way-
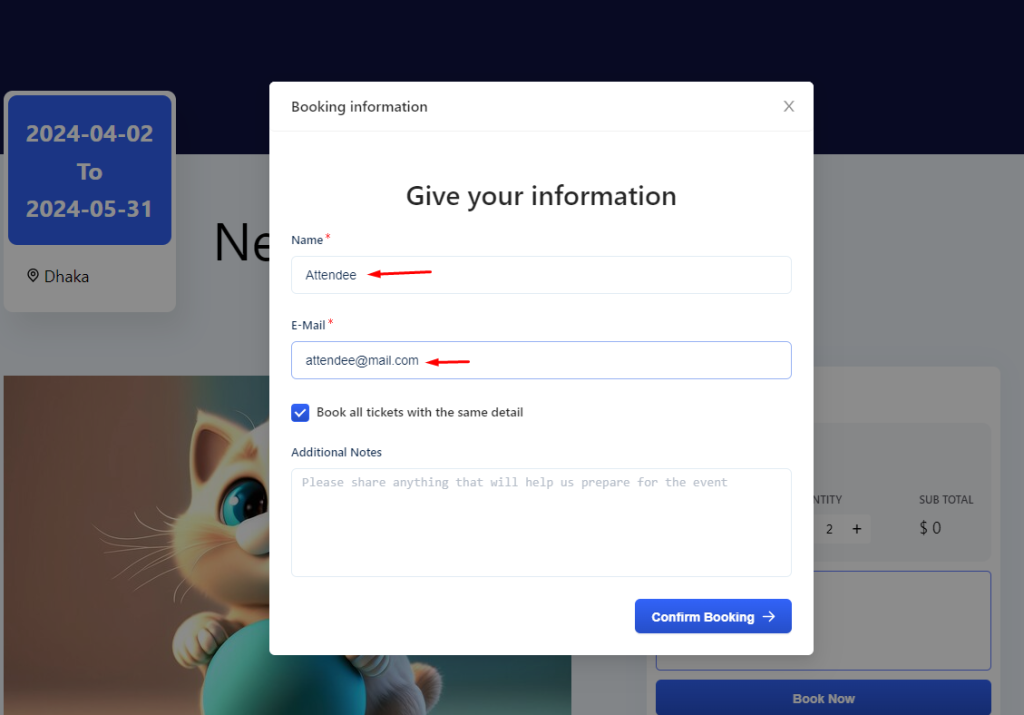
Participants
On an event, there can be various types of participants. There can be contributors, speakers, attendees, guests, etc. Export or collect those participants information on dashboard and track their activities more effectively.
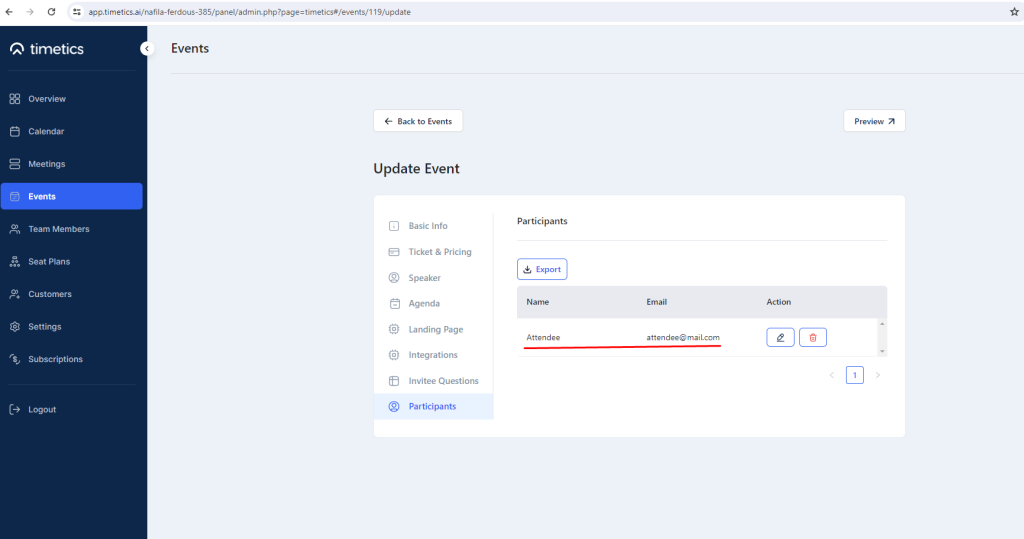
Once you are done setting additional fields of an event, Go back to ´Basic Info´ and the event information and setting will get updated.
Once everything is done, click on Update event. Select ´Preview´ for quality assurance of the event setting.
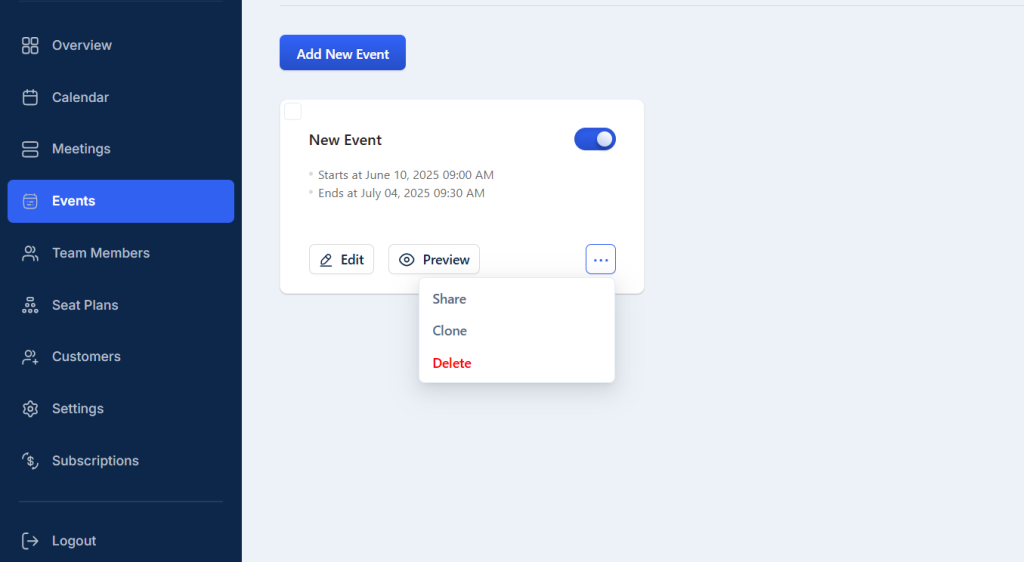
From the Events page, you can edit, share, clone, delete, and preview all the meetings.
