This documentation will guide you through the process of integrating Google Meet/ Calendar into your account. Follow the provided instructions carefully for a seamless integration.
Watch the video to get a clear understanding of the steps. or read the documentation below 🔽
Configure Google API
Enable Google Calendar API by following the steps given below.
1) Head over to the Google Cloud Console to begin the process.
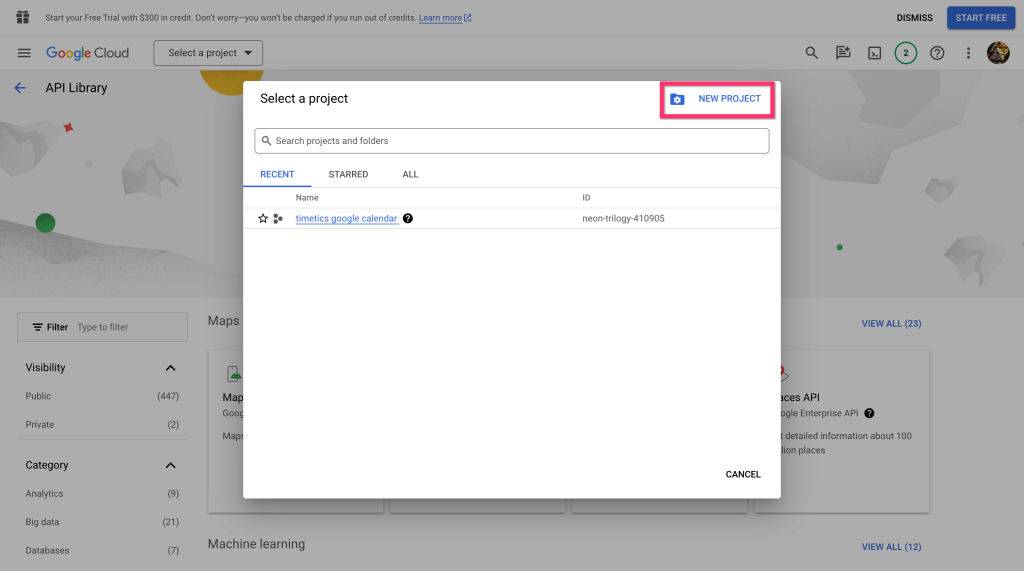
2) Create a new project to add Google Calendar to Timetics. Click on the “Select a project” button.

3) A new pop-up page will appear. Select ´New Project´.
4) Add a Project name and click on the Create button.

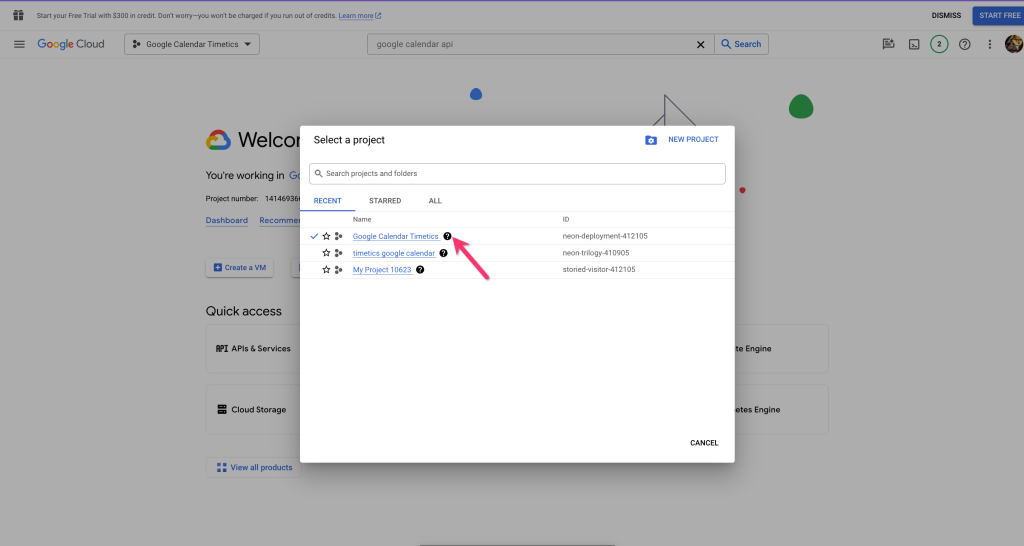
5) Now, go to the Google Calendar dashboard, click on ´select a project´, and pick a project that you have already created.
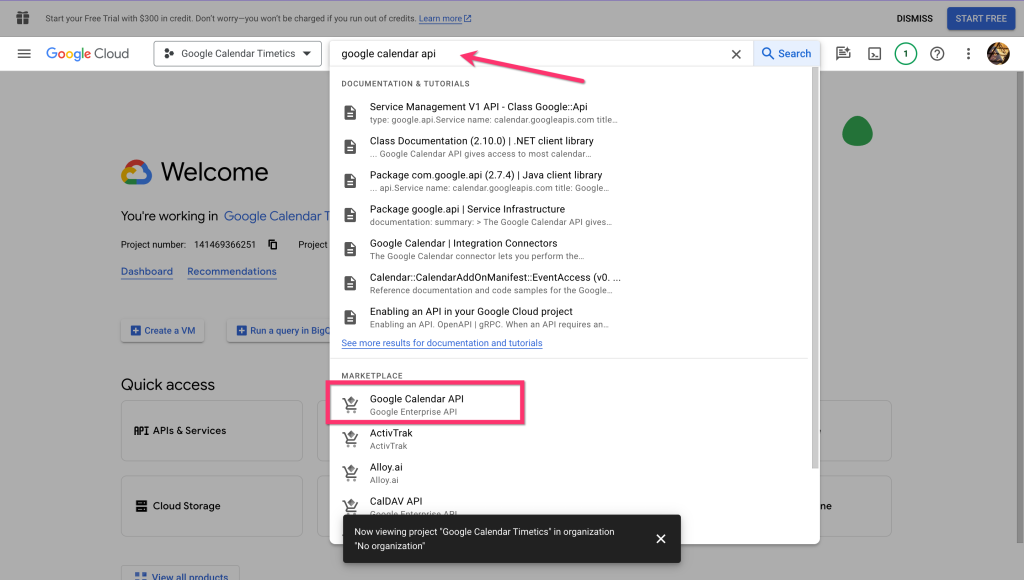
6) Search for “Google Calendar API” on the search bar and select it.
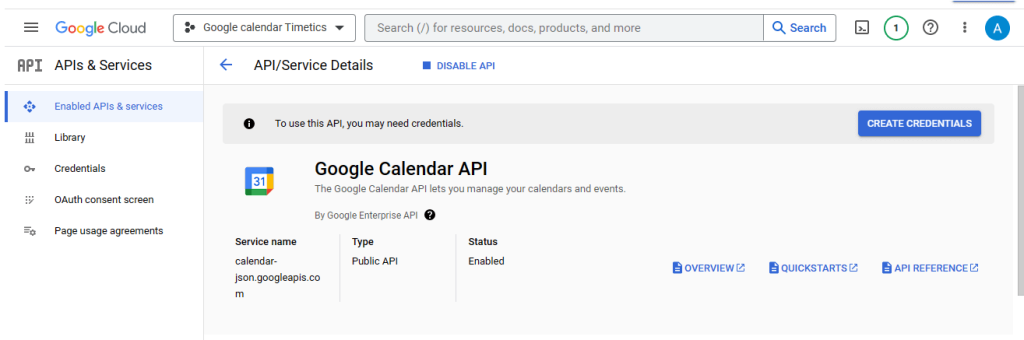
7) Enable this API by clicking on the Enable button.

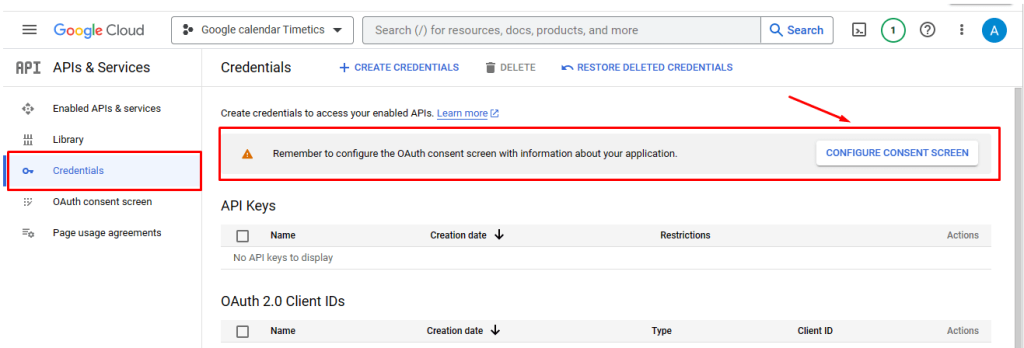
8) You will now be redirected to the API/Service details page.
9) From that page, Go to Credentials from the left sidebar menu. Now, click on Configure Consent Screen.
10) Select External and Click on the Create button.

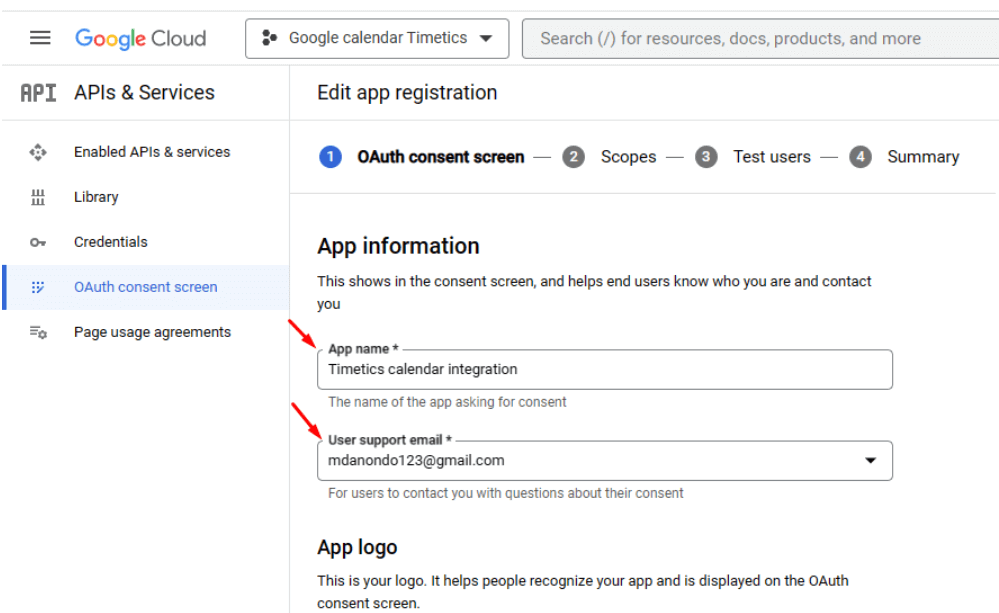
11) From the Edit App registrations page, Add your App name, User support email, and app logo (If needed), add your email address on Developer contact information, and click on save and continue.

12) You can simply skip the tabs shown below by Clicking on the Save and Continue button.
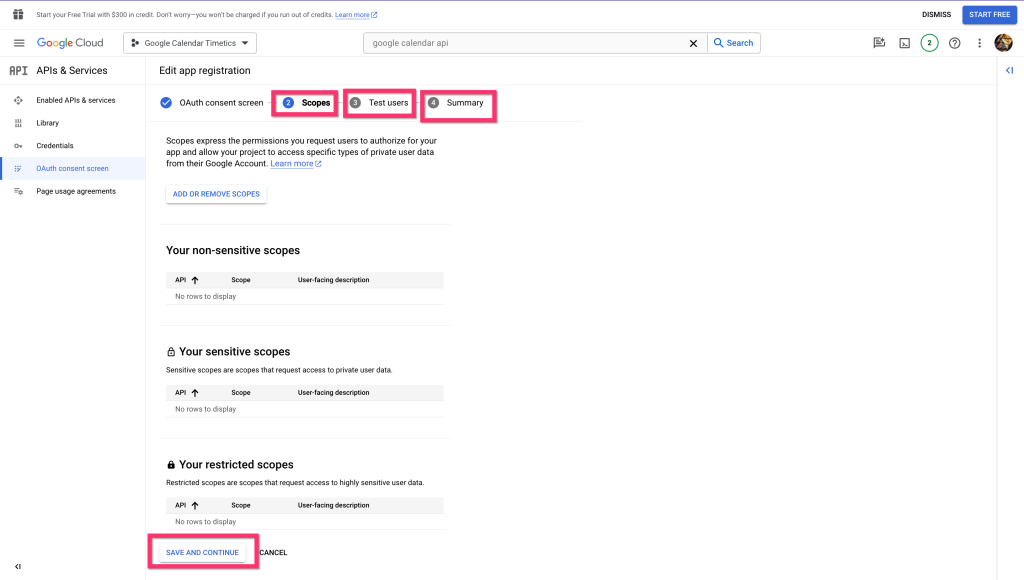
13) You can add more users to this app from the Test Users tab. if you want to skip to the summary page, simply click on Save and continue.

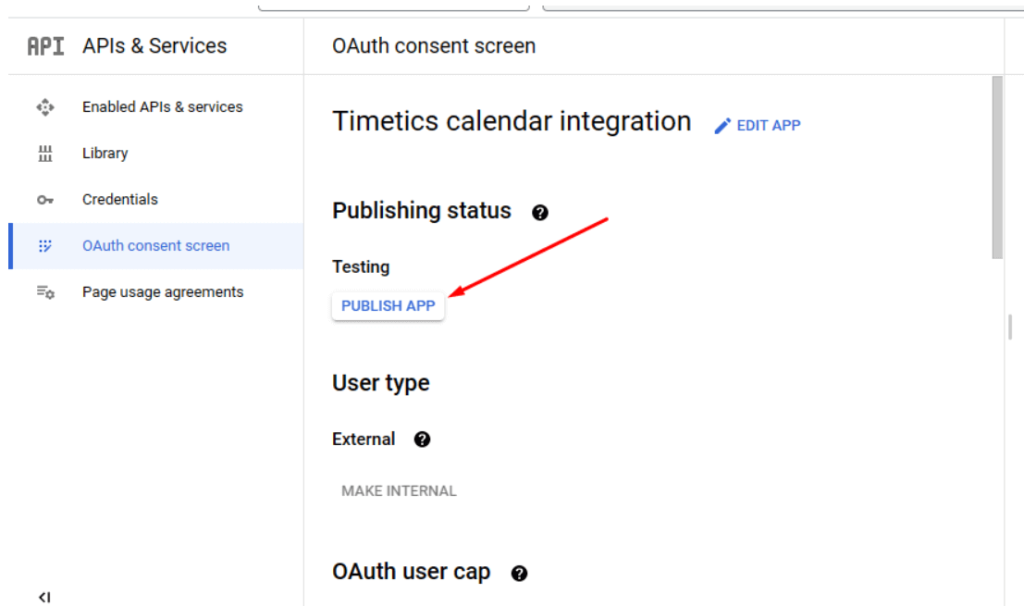
14) Click on the Back to the Dashboard button from the bottom of the page from the Summary Tab.

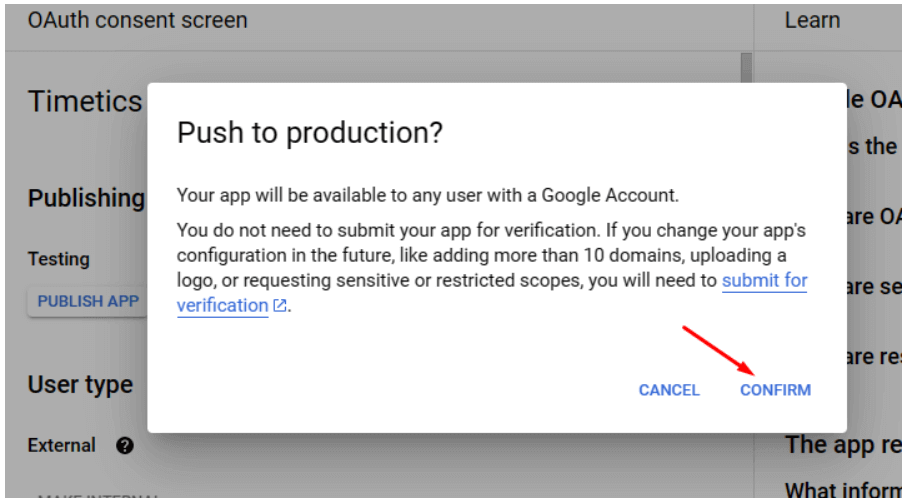
15) It will redirect you to the publishing status page. Click on the “Publish app” button from here.
16) It will ask you to confirm these changes, Click on the Confirm button to make changes.
17) At this point, again Go to the Credentials menu from the left sidebar.

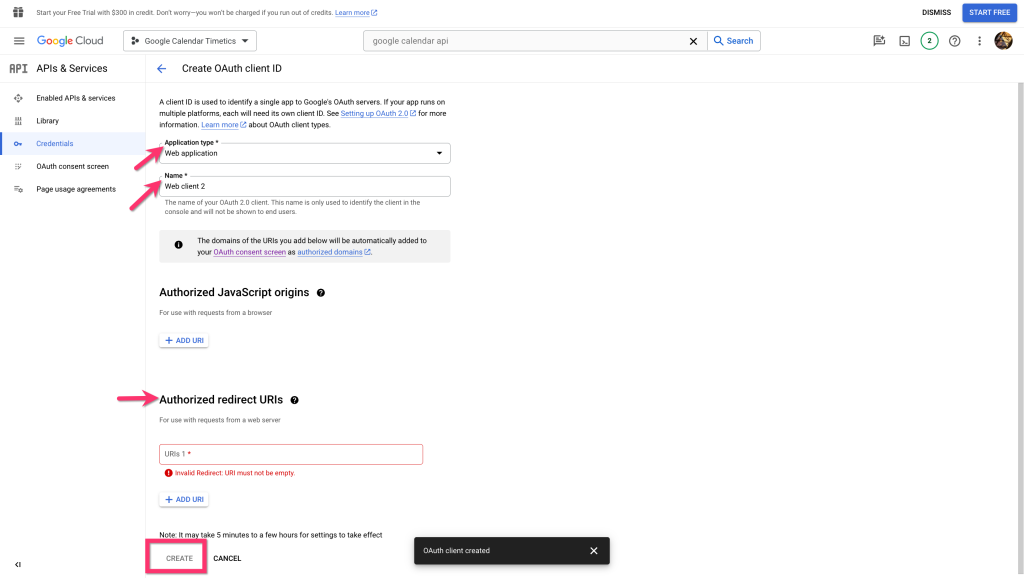
18) From the Credentials page, Click on the Create credentials link and choose OAuth client ID to create new credentials for our app.

19) From the Create OAuth client ID section, choose Application type as Web Application and Add a name.

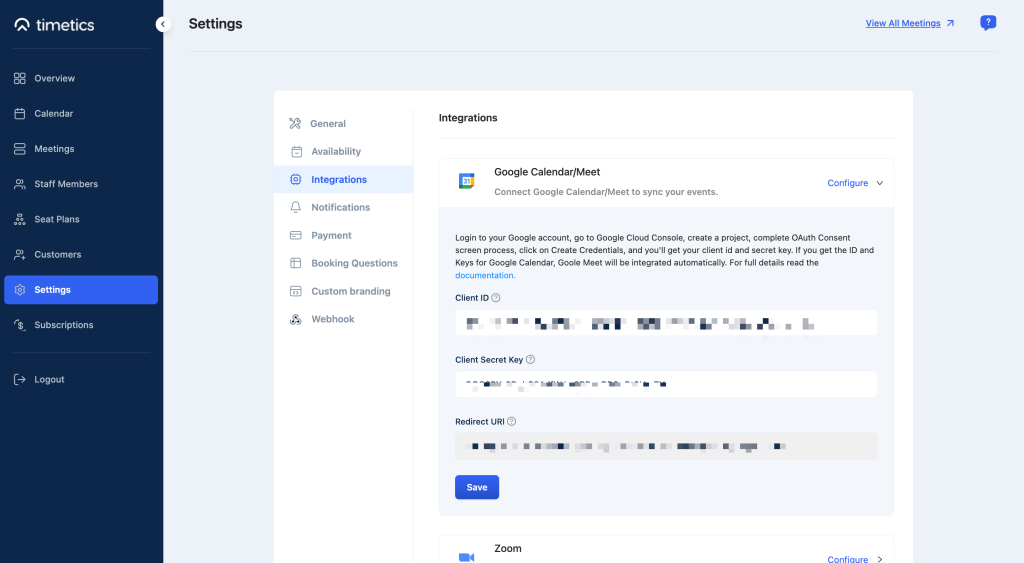
20) At this point, Go to your Timetics Dashboard > Click on Settings > Select Integration, and copy the redirect URI.

21) Now Go back to the ´Create OAuth Client ID´ tab and Paste the URI. Once done, click on the Create button.
22) As soon as you click on the Create button, a popup page will appear. Copy the client ID and Clint’s secret from here.
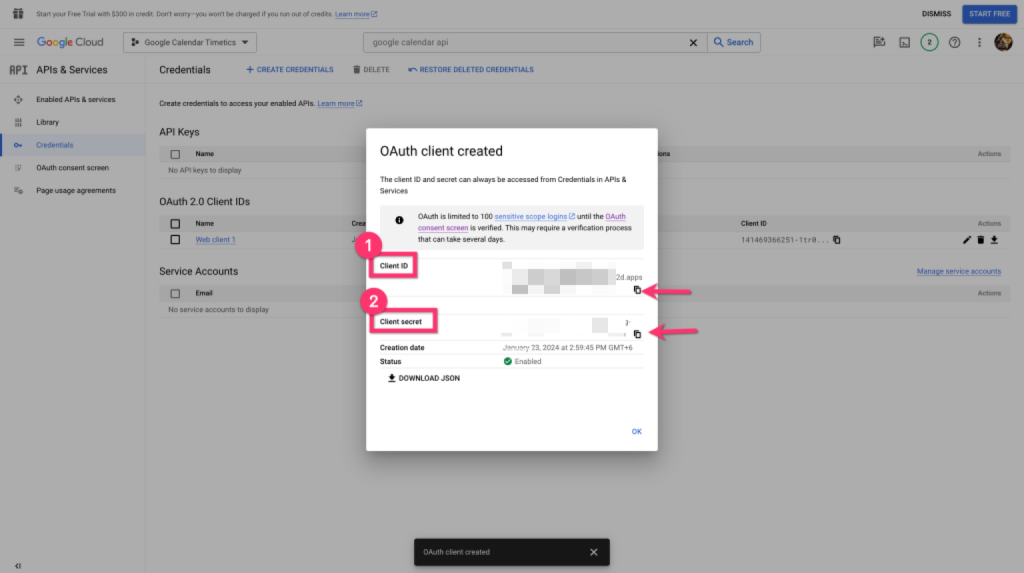
23) Paste the Client ID and Secret key on your Timetics account. Click on the save button.
Now, connect the App to sync your data from your website to Google Calendar.
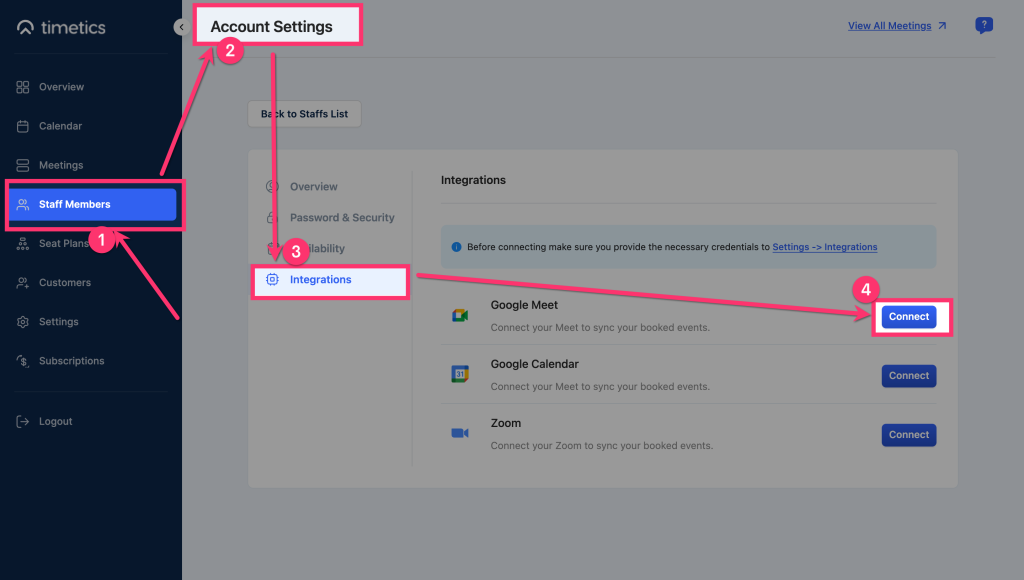
- To Connect Google Calendar/ Meet, Go to Staff Members> Manage > Integration > and Click on Connect.
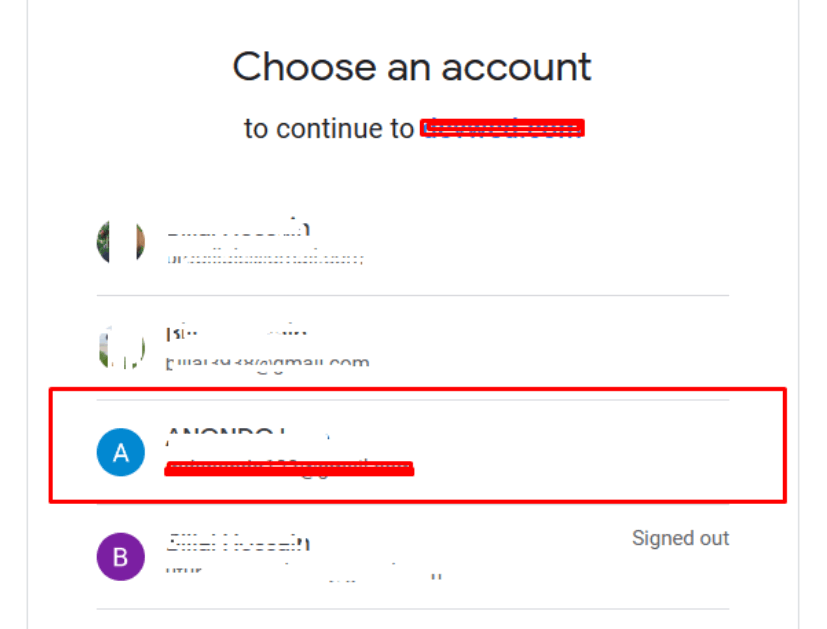
- Choose the Gmail account you used to create the API credentials.
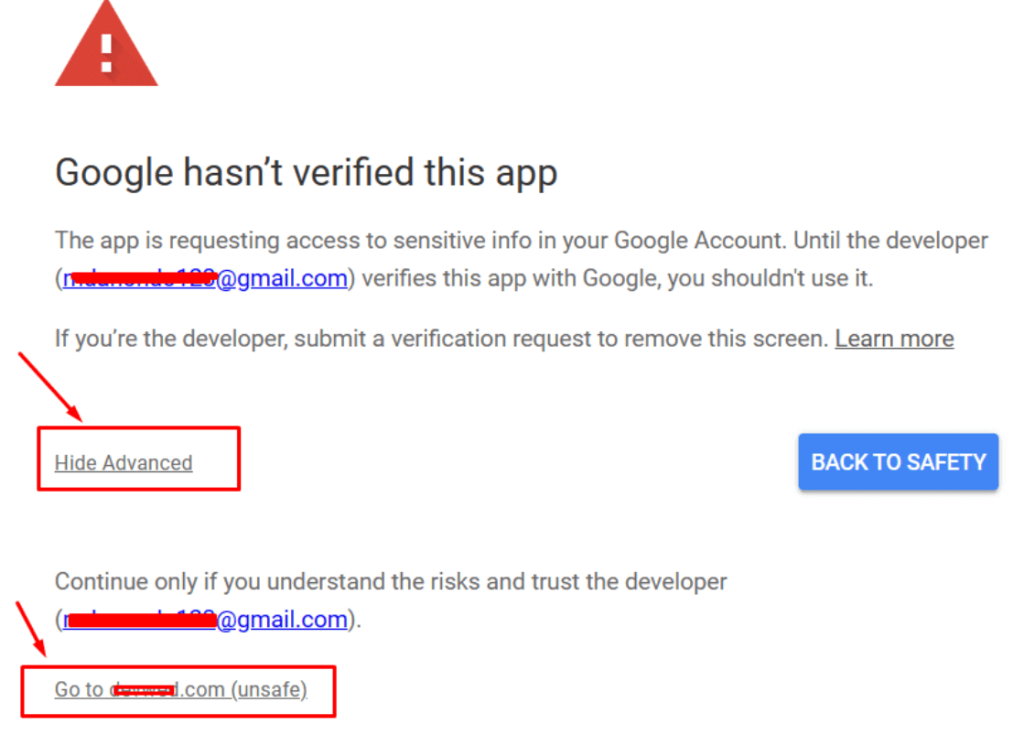
- If you see the warning called “Google hasn’t verified this app”, click on the show advance link and click on Go to ….com(unsafe).
- From the next screen, click on the Continue button
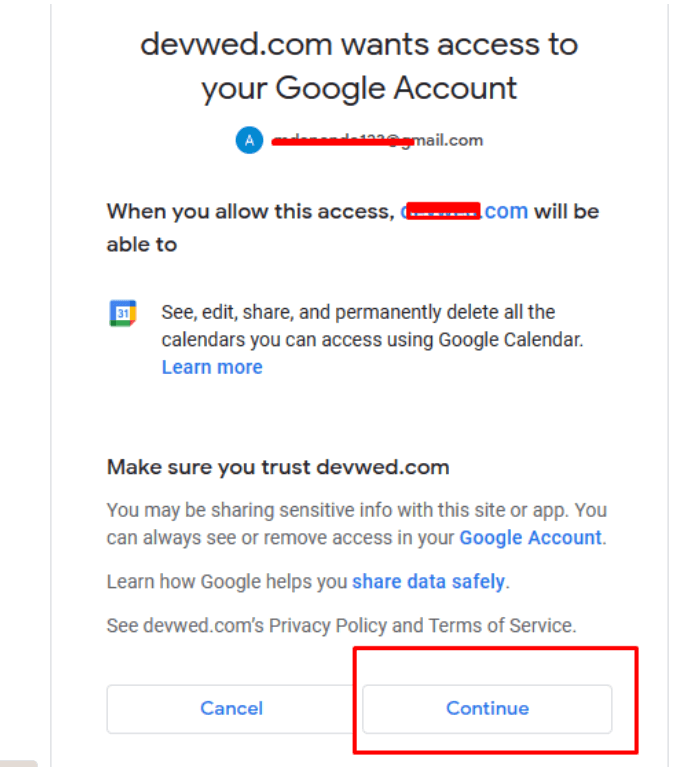
- And that’s it. Now you can see the integration process is successfully done.