Setting minimum and maximum ticket quantities for a seating plan allows you to manage the availability of seats effectively and ensure optimal utilization of space. In this article, we will go through the phrases for creating a seat plan meeting by setting minimum/maximum seats for attendees.
How to Set Seat Limitations on Timetics.ai
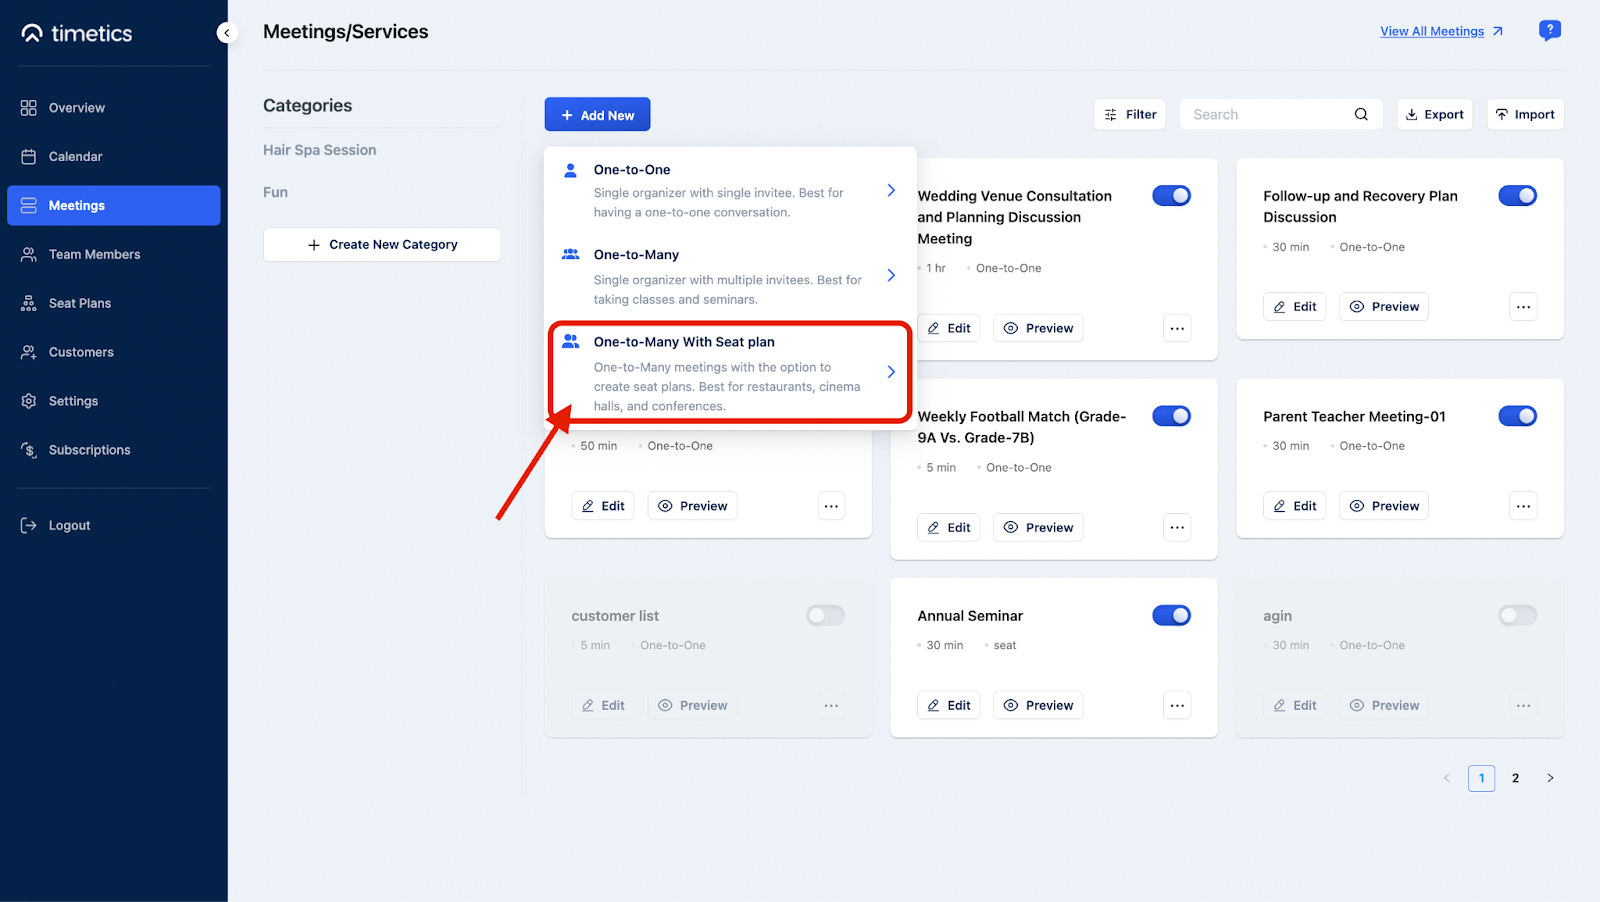
Here we will need to create a meeting and set seat limitation from the meeting creation form. So, to create a meeting,
- Go to Meetings
- Click on ´Add new´
- Select ´one-to-one-meeting with visual seat plan´.
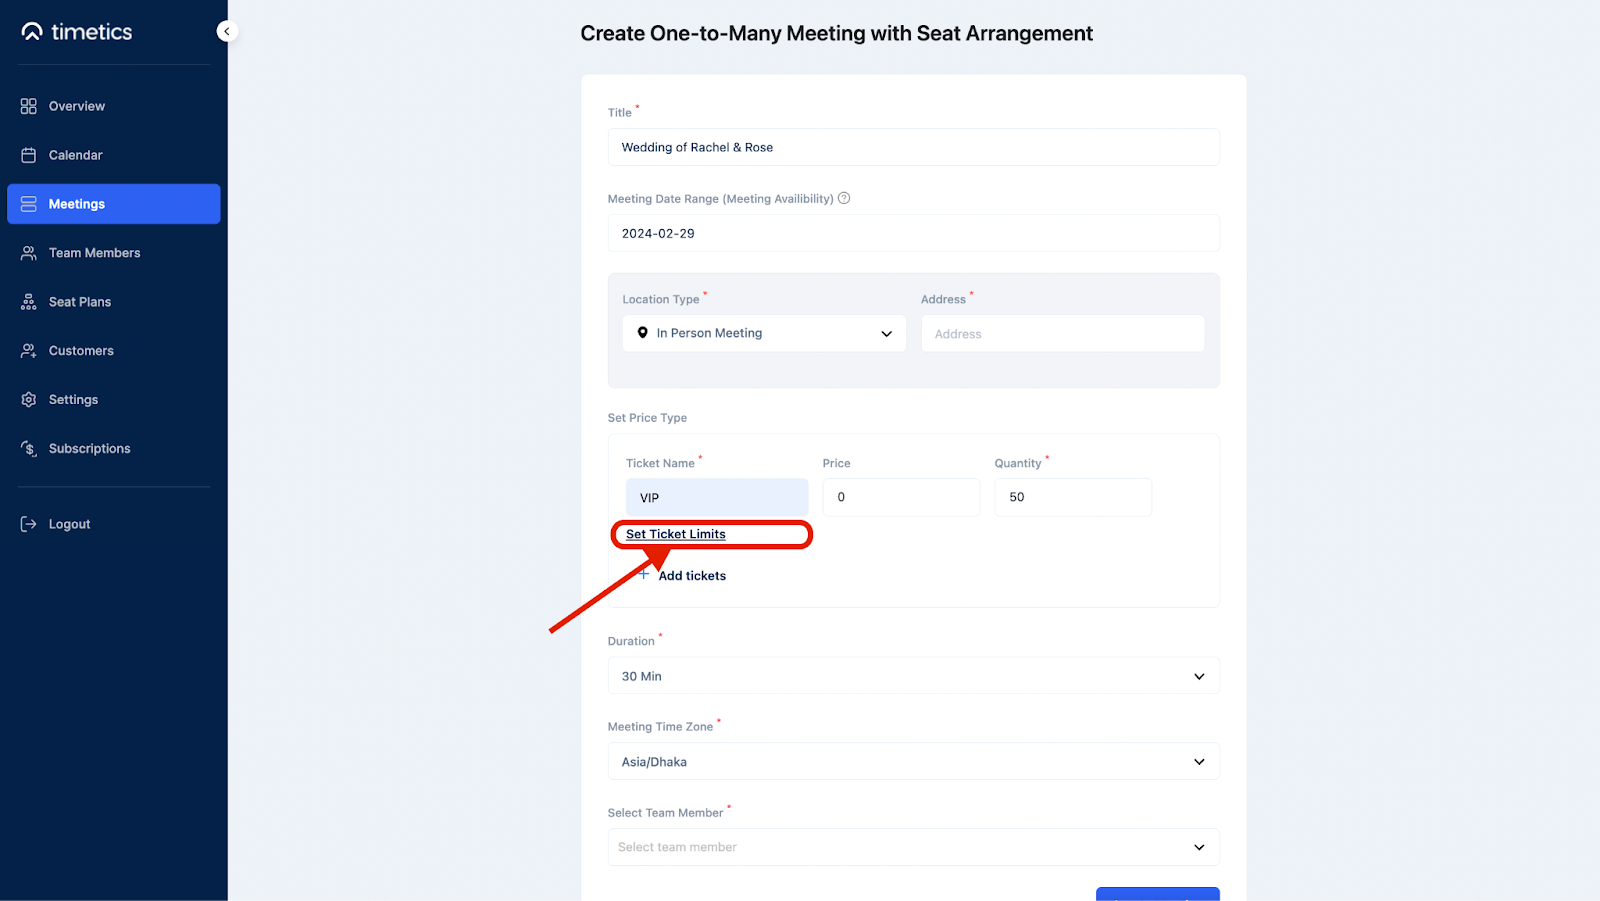
Now, fill out the form and click on ´Set Ticket Limits´.
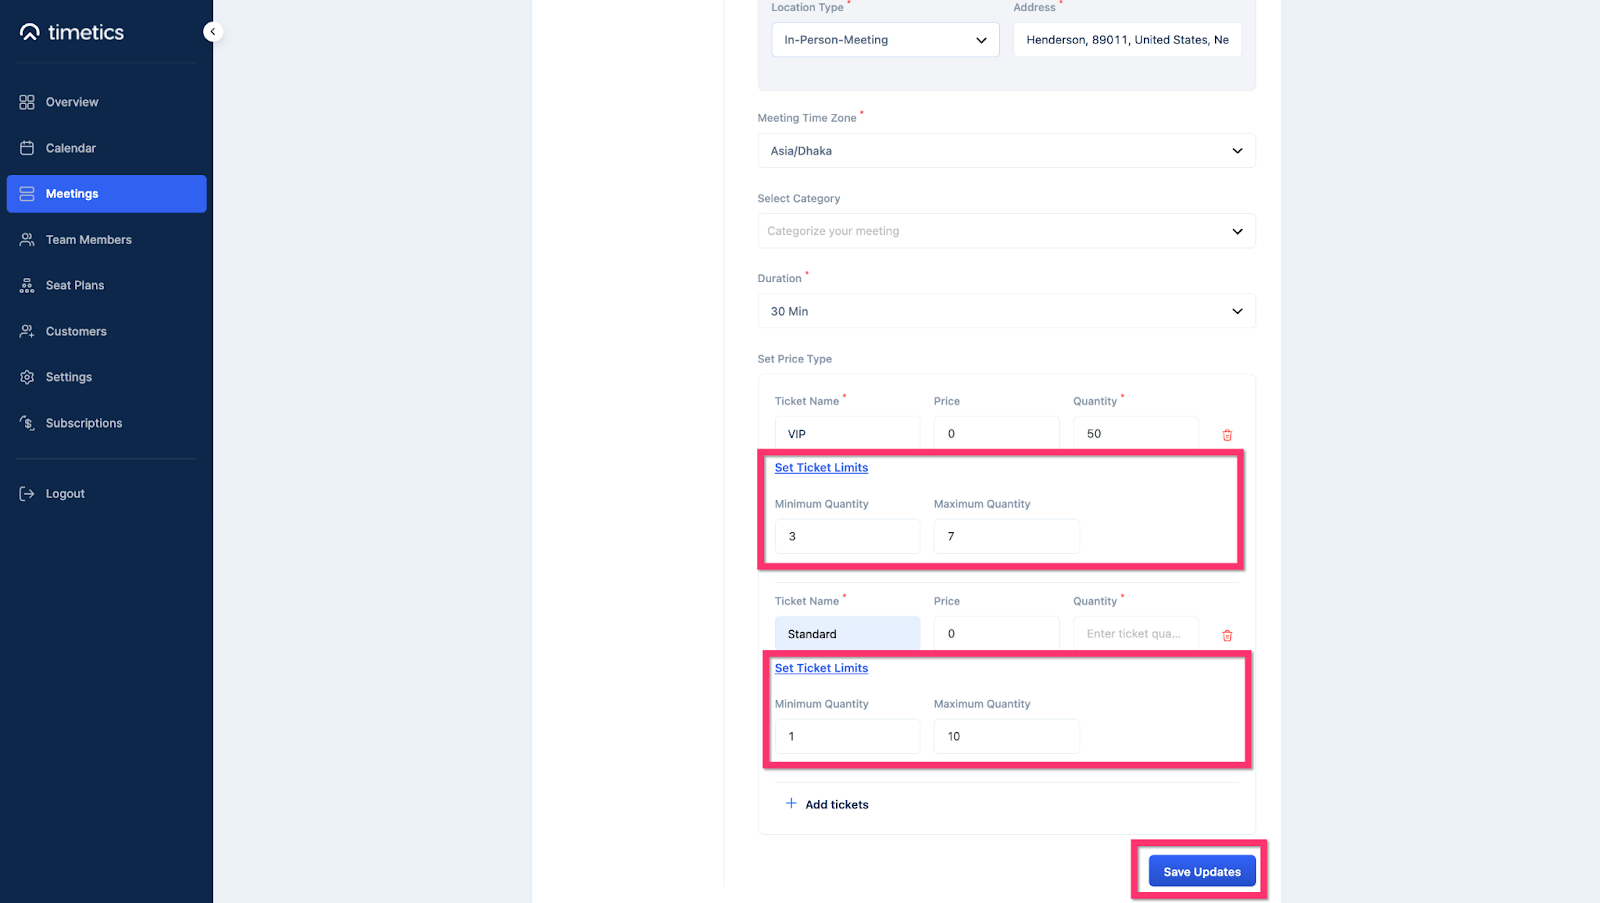
At this point, define a minimum and maximum number of attendees for your meeting, fill out the required fields, and click on ´Create Meeting´.
Here, you will be redirected to the seat-plan editor where you can decorate seats according to your choice.

Once you are done with customizing your seat plans, click on ´Save´ to finish the process.
Customer View of Minimum/ Maximum Seats
Here, you can see the customer preview of this meeting by clicking on the ´preview´ button.

On the booking page, your guests/customers will see a reminder about the seat selection limitations–
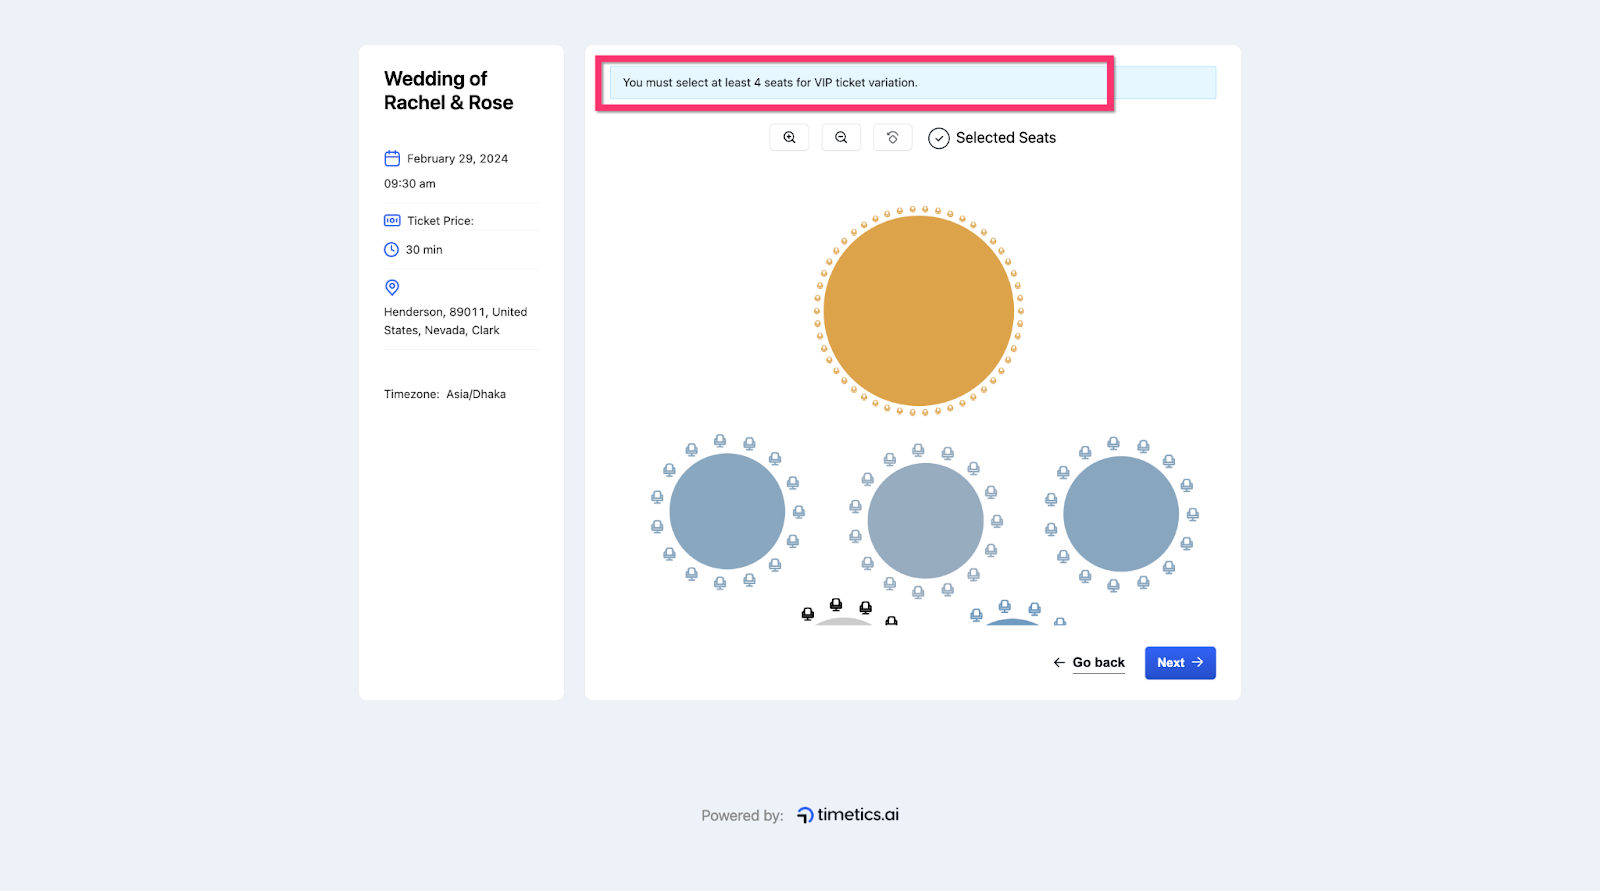
Here, you can see that a user can´t move forward with booking unless their seat selection matches the requirements. You can see, the ´Next´ button is not working because a user selected only 3 seats rather than selecting 4.

It means, your meeting with maximum and minimum seat limitations has been successfully created!