This documentation will guide you through the process of integrating Zoom into your account. Follow the provided instructions carefully for seamless integration and successful access to create Zoom meetings and webinars.
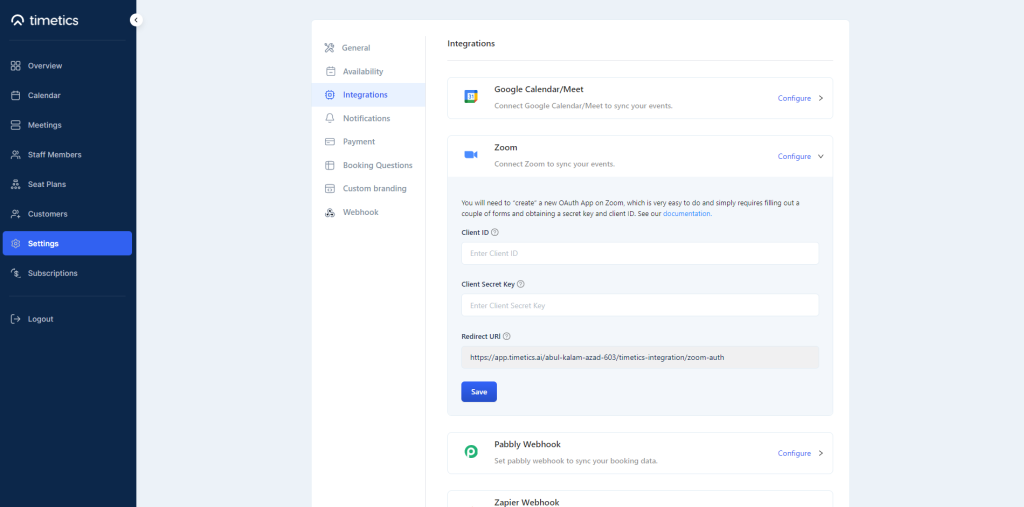
Here´s how to access the Zoom Integration setting on Timetics: Go to the Timetics dashboard > Select Settings from the sidebar > click on Zoom.
Generating API and Secret Keys
For this integration, you need to use the OAuth token method to make the API connection. The steps are explained below.
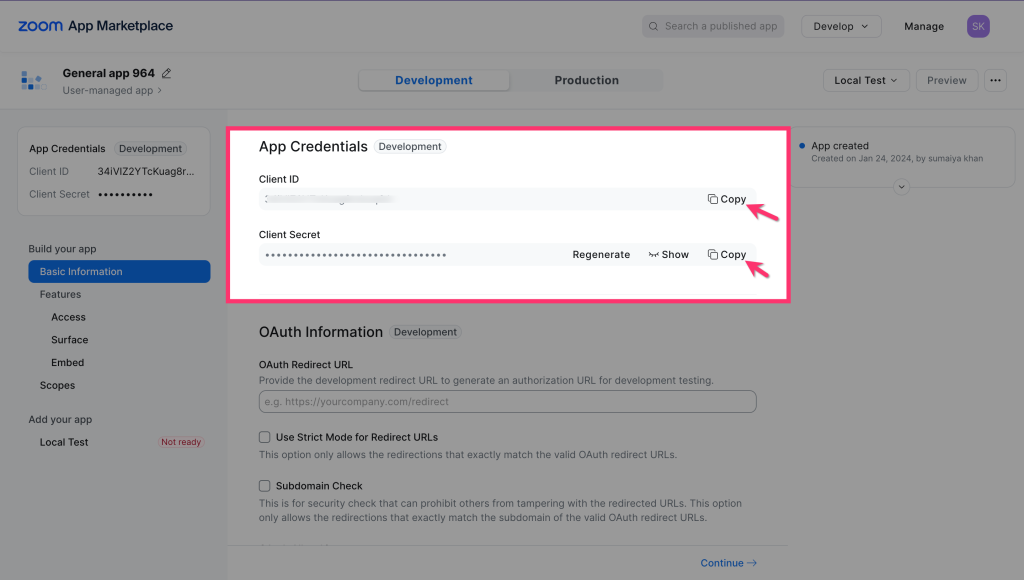
1) Visit Zoom Marketplace. Click on Develop > Select Build App from the top right corner of the page.
2) Set the ´Choose app type´ to “User-managed app”. Now, click on the Save button, and an OAuth app will be created.
3) Now, copy the Client ID and Client Secret Key for later use.
4) Now, go back to the Timetics integration page, following this direction: Timetics Dashboard > Settings > Integration > Zoom.
Input your copied Client ID & Client Secret Key on that Zoom integration fields.
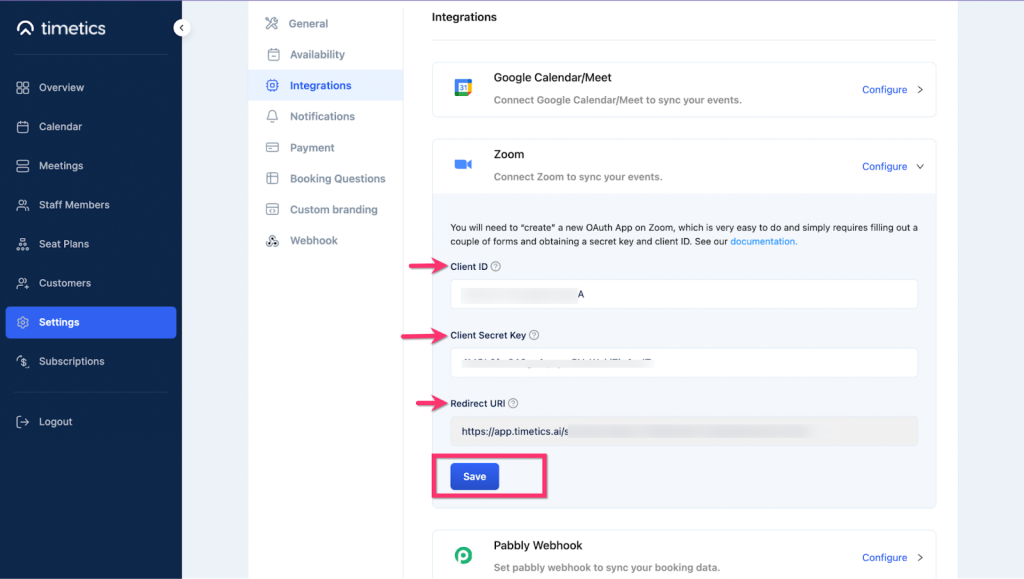
5) Here in this panel, you will also find a Redirect URL for OAuth. Copy it and click save.
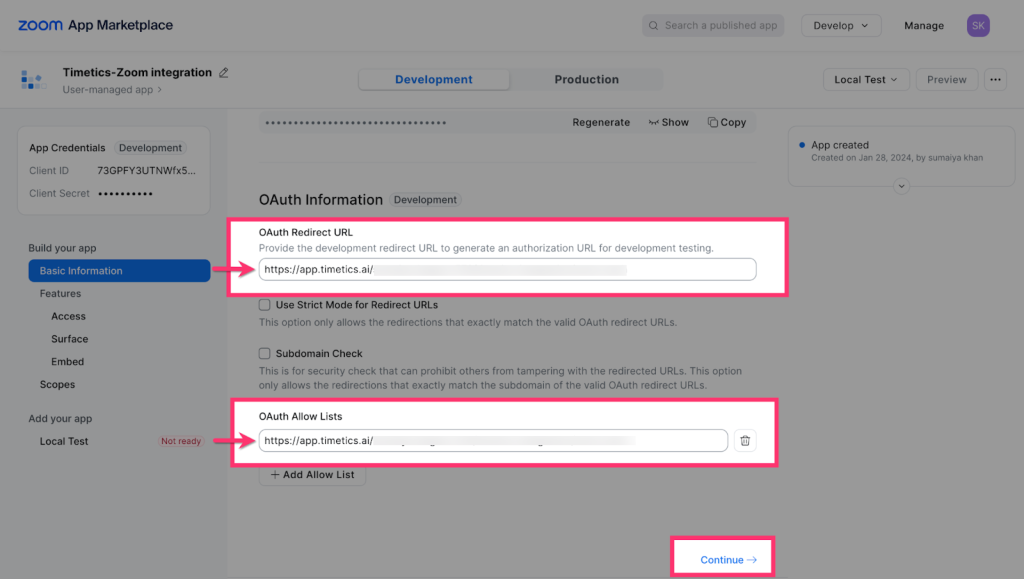
6) Return to the Zoom App Marketplace again.
Paste the Redirect URL on Zoom OAuth Redirect URL and OAuth Allow List input fields and select Continue.
7) Now as we don´t need to set anything from the ´Access´, ´Surface´, and ´Embed´ fields, directly click on the Scopes section from the left sidebar. And select ´+Add Scopes´.
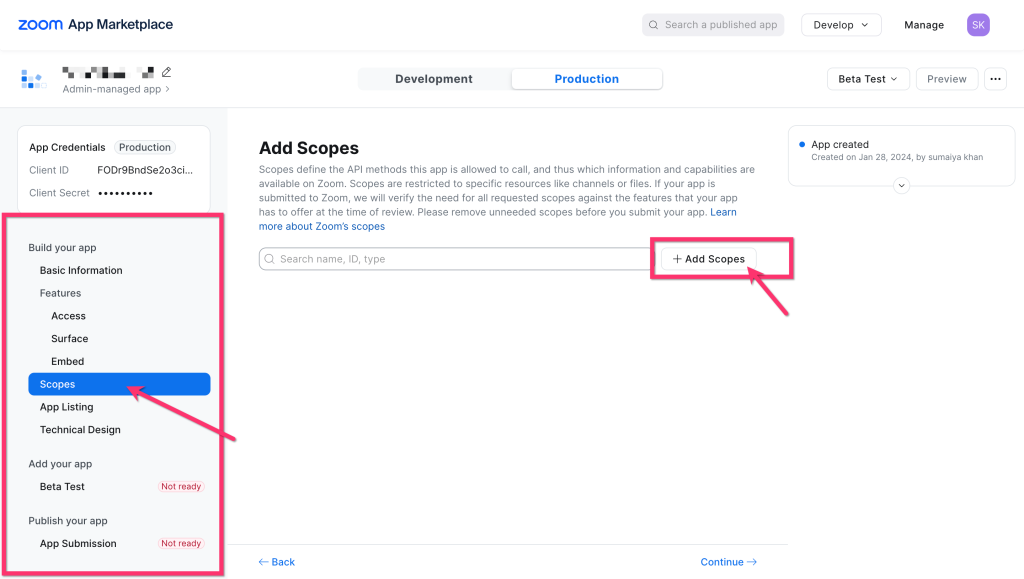
8) A new pop-up page will appear. Enable all the scopes for Meetings and User types. Click on ´Done´ to save changes.
meeting:write:meeting — Create a meeting for a user meeting:read:meeting — View a meeting user:read:user — View a user
9) At this point Go back to your Timetics Dashboard > Staff Members > Manage > Integration > and click on Connect.
10) A new page will appear. Select ´Allow´. Now, Zoom is connected successfully to your Timetics account.
Troubleshooting
- If the connection fails, make sure you are logged into the correct Zoom account before clicking Connect.
- If you see a permissions error, try disconnecting and reconnecting from Settings > Integrations > Zoom.
- Ensure your Redirect URL in Timetics matches exactly what is entered in the Zoom App Marketplace.
- For further help, contact [email protected].
Usage
Prerequisites
- An active Timetics.ai account
- A Zoom account (Free or paid)
- Zoom integration connected via the steps above
How It Works
Once connected, every new booking confirmation on Timetics automatically generates a unique Zoom meeting link. No manual setup is required for each booking.
Step-by-step flow:
1) A guest visits your Timetics booking page and selects an available time slot.
2) Upon booking confirmation, Timetics automatically calls the Zoom API to create a meeting on behalf of the connected host.
3) The generated Zoom meeting link and meeting ID are stored and attached to the booking record.
4) Both the host and the guest receive a booking confirmation email containing the Zoom meeting link.
5) At the scheduled time, both parties can join the meeting directly from the link in their confirmation email.
What Data Is Accessed
- Your Zoom user profile is accessed to identify and link your Zoom account to Timetics.
- Meetings are created on your behalf using your connected Zoom account credentials.
- The meeting link and meeting ID are stored in your Timetics account and attached to the relevant booking.
Notes
- Each booking generates a unique Zoom meeting link. Links are not reused across bookings.
- If a booking is cancelled, the associated Zoom meeting is also cancelled automatically.
- The integration works for both one-to-one and one-to-many meeting types on Timetics.
Removing the App
Disconnecting Zoom from Timetics
1) Log in to your Timetics account.
2) Go to Settings > Integrations > Zoom.
3) Click the Disconnect button next to your connected Zoom account.
4) Your Zoom account will be unlinked from Timetics immediately.
What Happens When You Disconnect
- Your Zoom OAuth access token is permanently deleted from Timetics servers upon disconnection.
- Future bookings will no longer generate Zoom meeting links automatically.
- Existing bookings with previously generated Zoom links are not affected — those links remain valid until the meeting is deleted on Zoom’s side.
- No Zoom user data is retained by Timetics after disconnection.
Removing the App from Your Zoom Account
To fully revoke Timetics access from your Zoom account:
1) Log in to your Zoom account at zoom.us.
2) Go to My Apps from the top navigation.
3) Find Timetics.ai in the list of authorized apps.
4) Click Remove to revoke access.
This will permanently revoke Timetics’ permission to access your Zoom account. If you wish to reconnect in the future, you will need to go through the authorization process again from Settings > Integrations > Zoom in your Timetics dashboard.