This documentation will guide you through the process of integrating Zoom into your account. Follow the provided instructions carefully for seamless integration and successful access to create Zoom meetings and webinars.
Here´s how to access the Zoom Integration setting on Timetics: Go to the Timetics dashboard > Select Settings from the sidebar > click on Zoom.
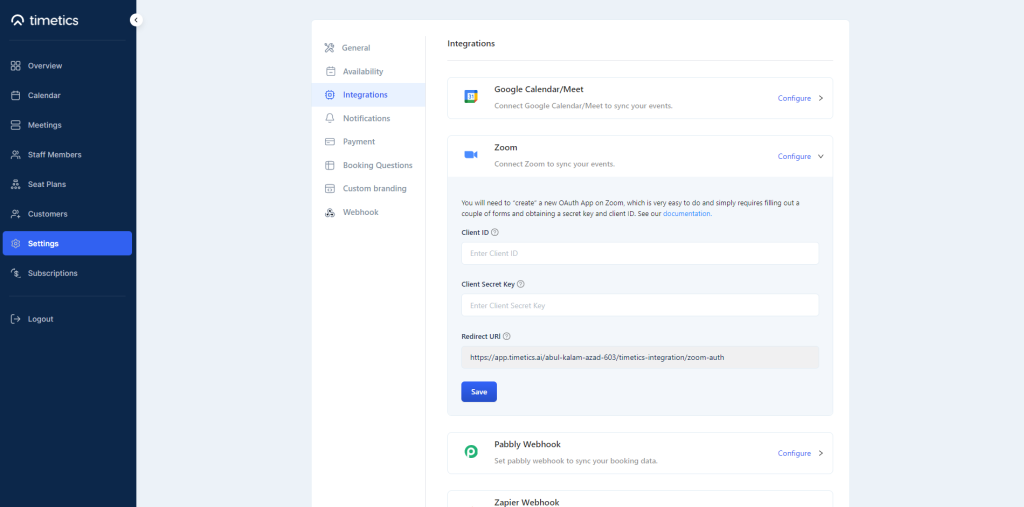
Generating API and Secret Keys
For this integration, you need to use the OAuth token method to make the API connection. The steps are explained below.
1) Visit Zoom Marketplace. Click on Develop > Select Build App from the top right corner of the page.
2) Set the ´Choose app type´ to “User-managed app”. Now, click on the Save button, and an OAuth app will be created.
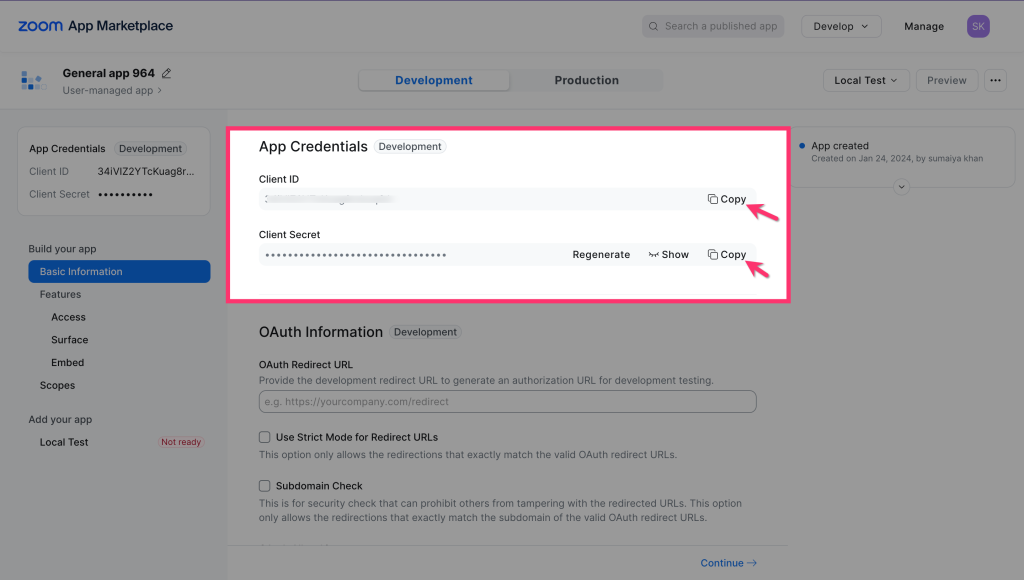
3) Now, copy the Client ID and Client Secret Key for later use.
4) Now, go back to the Timetics integration page, following this direction: Timetics Dashboard > Settings > Integration > Zoom.
Input your copied Client ID & Client Secret Key on that Zoom integration fields.
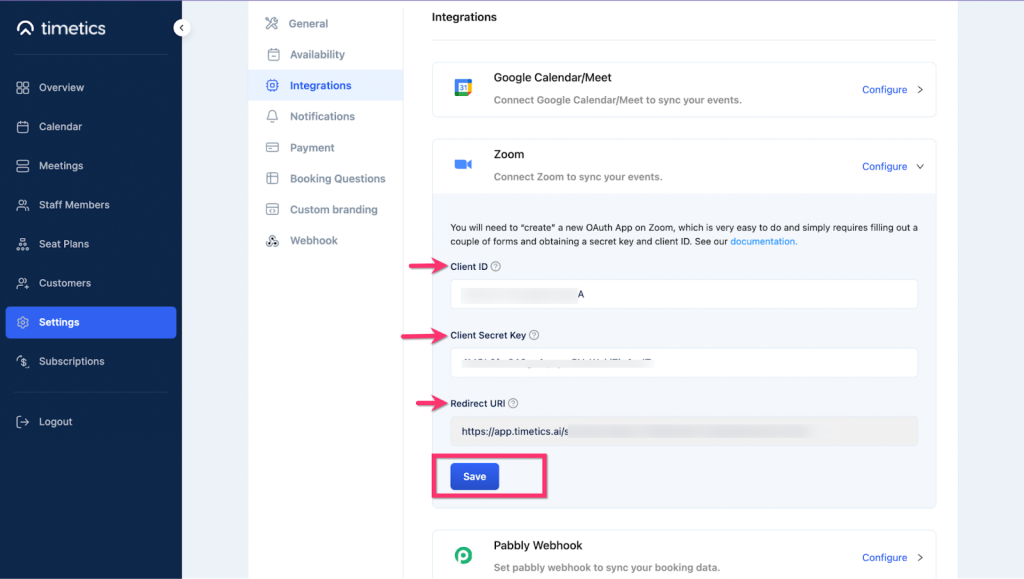
5) Here in this panel, you will also find a Redirect URL for OAuth. Copy it and click save.
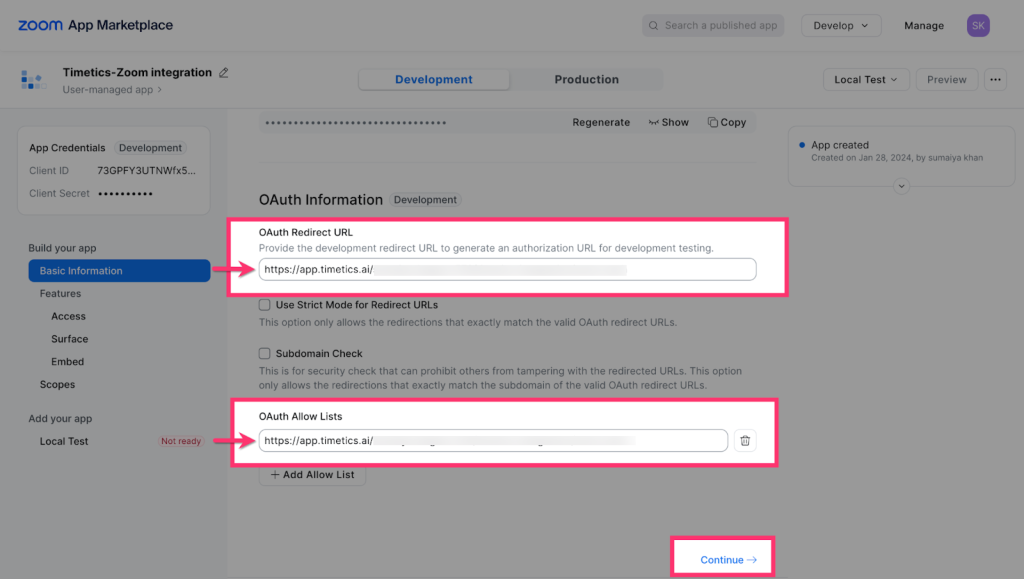
6) Return to the Zoom App Marketplace again.
Paste the Redirect URL on Zoom OAuth Redirect URL and OAuth Allow List input fields and select Continue.
7) Now as we don´t need to set anything from the ´Access´, ´Surface´, and ´Embed´ fields, directly click on the Scopes section from the left sidebar. And select ´+Add Scopes´.
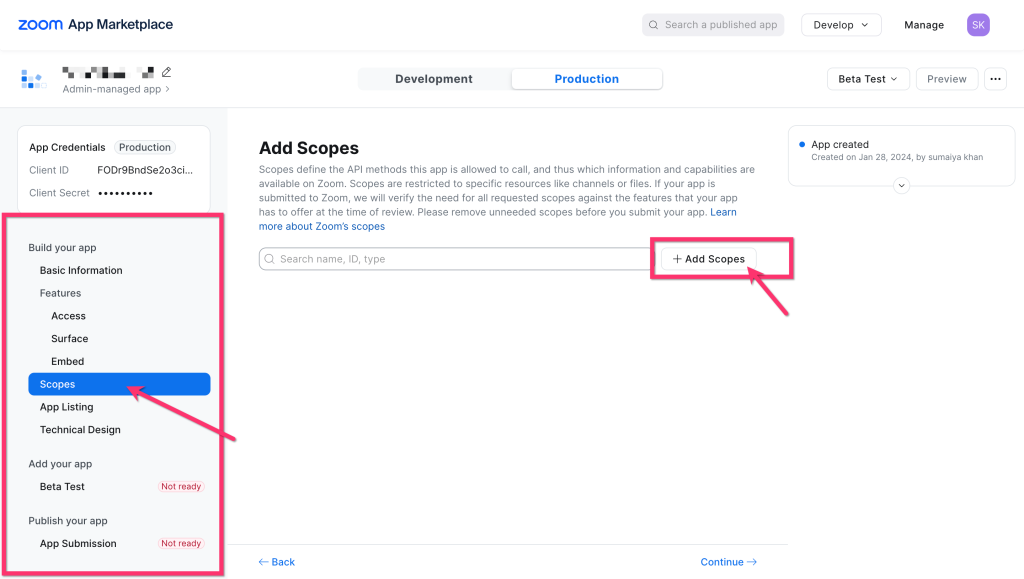
8) A new pop-up page will appear. Enable all the scopes for Meetings and User types. Click on ´Done´ to save changes.
9) At this point Go back to your Timetics Dashboard > Staff Members > Manage > Integration > and click on Connect.
10) A new page will appear. Select ´Allow´. Now, Zoom is connected successfully to your Timetics account.